
Propagation
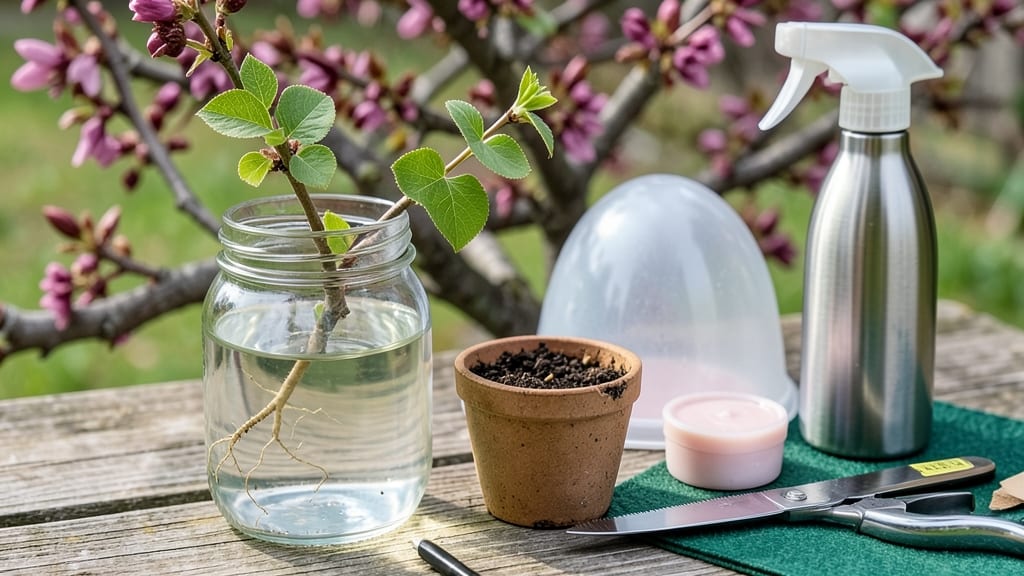
Starting a redbud tree from a cutting is easier than you think—especially with this layering trick that produces roots in just 6 weeks. 🌱 I’ve rooted my share of stubborn cuttings, and redbuds respond beautifully when you follow the right steps. The key?
Timing, moisture, and a little patience to watch those first roots form. You’ll need sharp pruners, rooting hormone (optional but helpful), a plastic bag or clear container, and a healthy branch from last year’s growth.
The best time to take cuttings is in early spring when the tree is actively growing but before the buds burst. This method works even for beginners—no greenhouse required. By the time summer rolls around, you’ll have a rooted cutting ready to transplant.
The roots won’t be massive, but they’ll be strong enough to support new growth when you move it to soil. Watch for tiny white roots poking through the layering site—that’s your signal to separate it. This trick saves money and lets you grow rare varieties from your own trees.
Just avoid overwatering and keep the cutting in bright, indirect light until roots form. Ready to clone your favorite redbud?
📚 In This Guide
- What you need
- Instructions
- Tips and common mistakes
- Wrapping up and next steps
What you need
- ● Mature redbud branch: 4–6 inches long, pencil-thick (½–¾ inch diameter), with at least 2–3 leaf nodes. Harvest in late winter or early spring (before buds swell) for best results.
- ● Rooting hormone: A powder or gel (e.g., Clonex or Dip ‘N Grow) to boost root growth. A 1-ounce jar covers 10–15 cuttings.
- ● Sharp pruning shears or knife: Sterilized to prevent disease. A bypass pruner (not anvil-type) is ideal for clean cuts.
- ● Well-draining potting mix: A 50/50 blend of perlite and peat moss or coconut coir (avoid garden soil—it compacts and holds too much moisture). A 1-gallon container per 3–4 cuttings.
- ● Plastic bag or clear dome: To create a humidity tent. A ziplock bag with holes or a 6-inch propagation dome works.
- ● Spray bottle: With water to mist cuttings (a 16-ounce spray bottle is perfect).
- ○ Plastic wrap or plastic cup: For air layering (optional but highly effective).
- ● Twine or rubber band: To secure plastic wrap around the branch (if air-layering).
- ● Fungicide: Like hydrogen peroxide (3%) or a commercial fungicide to dip cuttings and prevent rot.
- ● Heat mat: Set to 70–75°F to speed up rooting (especially in cooler climates).
- ● Grow lights: A LED bulb (12–15 watts) for 12–14 hours/day if natural light is dim.
- ● Label markers: To track cutting dates and varieties (because who doesn’t love a little organization?).
- ● Misting nozzle: Attaches to a hose for larger batches of cuttings.
How to grow a redbud tree from a cutting using simple layering
This method works even with inexperienced hands—just follow the steps and you’ll have rooted redbud cuttings in weeks.
🌱 Step 1: Select and Prepare the Cutting
Choose a healthy, pencil-thick stem from the current season’s growth—it should be about ¼ to ½ inch in diameter. Look for a section with at least 3-4 leaf nodes (the little bumps where leaves grow). Use clean, sharp pruners to make a 45-degree cut just below a node.
Remove all but the top 2-3 leaves to reduce moisture loss. Strip the lower half of the stem bare by gently rubbing off the leaves—this is where roots will form. Dip the cut end in rooting hormone (optional but helpful) to encourage faster growth.
🌿 Step 2: Create the Layering Setup
Find a spot on the parent tree where the cutting will stay in place without bending. Make a small slit in the bark about 1-2 inches down from the cut end—this creates space for roots to grow. Bend the cutting down so the cut end sits near the slit, then secure it with a plastic zip tie or bent wire.
Cover the cut end and the slit with moist sphagnum moss (hold it in place with another zip tie). Keep the moss damp but not soggy—it should feel like a wrung-out sponge. This creates a humid microclimate where roots will form without drying out.
💧 Step 3: Monitor and Encourage Root Growth
Check the moss weekly to ensure it stays moist. If it dries out, roots won’t form—just mist lightly with water. In 6-8 weeks, gently tug on the cutting. If you feel resistance, roots are growing! If not, wait another week or two before trying again.
Once roots form, carefully sever the cutting from the parent plant with clean pruners. Plant it in a pot with well-draining soil or transplant directly into the ground. Keep the soil consistently moist but not waterlogged for the first few weeks to help it establish.
☀️ Step 4: Transition to Independent Growth
After transplanting, place the new redbud in partial shade for the first week to reduce stress. Gradually introduce it to full sun over the next 2 weeks. Water deeply once a week unless rainfall provides enough moisture—redbuds hate soggy roots but need consistent hydration.
Fertilize lightly in spring with a balanced 10-10-10 formula to encourage strong growth. Avoid heavy pruning the first year—let the tree focus on establishing its root system. You’ll see new leaves and branches within a few months, signaling success!
Tips & tricks for perfect redbud tree layering
Here's what nobody tells you about making this propagation method work flawlessly—tricks that'll save you from common pitfalls.
Timing Secret: In Step 3, when you're checking for root growth at 6-8 weeks, don't rush the test. Roots need time to strengthen—if you tug too soon, you might snap the cutting instead. I wait until I see tiny white root hairs peeking from the moss before I'm confident. Also, morning is the best time to test because the plant is fully hydrated from overnight.
Equipment Intel: For Step 2, if you don't have plastic zip ties, use bent wire or even a bent paperclip—anything that creates gentle pressure works. The key is to keep the cutting stable without crushing the stem. I've even used rubber bands in a pinch, but they can get brittle over time and snap. For the slit in the bark, a small utility knife works best—just be careful not to cut too deep into the wood beneath.
Moisture Management: That "wrung-out sponge" feeling for the sphagnum moss in Step 2 is crucial. Too wet and you risk rot, too dry and roots won't form. I keep a spray bottle handy and mist the moss every 2-3 days if it's not raining. In hot weather, you might need to check daily—roots need consistent moisture but not a soggy environment. A clear plastic bag loosely tied around the cutting creates extra humidity without trapping too much moisture.
Pro Tips for Start A Redbud Tree From A Cutting
- Here's what nobody tells you about making this propagation method work flawlessly—tricks that'll save you from common...
- Timing Secret: In Step 3, when you're checking for root growth at 6-8 weeks, don't rush the test. Roots need time to ...
- Equipment Intel: For Step 2, if you don't have plastic zip ties, use bent wire or even a bent paperclip—anything that...
Frequently asked questions
Got questions about propagating redbud trees from cuttings? You’re not alone! Here are some of the most common concerns—plus clear, actionable answers to help you succeed.
Can I root a redbud cutting in water, or do I need soil?
While some plants root well in water, redbuds thrive better with soil-based propagation (like the layering method). Water rooting often leads to weak, brittle roots. For best results, stick to soil or a rooting hormone + moist potting mix. If you’re curious, try a backup cutting in water—but expect slower, less reliable growth.
How long does it take for roots to form on a redbud cutting?
With the layering trick, you’ll typically see roots in 4–6 weeks under ideal conditions (warmth, humidity, and consistent moisture). Patience is key! Avoid disturbing the cutting during this time. If roots don’t appear by 8 weeks, check for common issues like overwatering or poor airflow.
What’s the best time of year to take redbud cuttings?
The late spring to early summer (May–June) is prime time for redbud cuttings, as the tree is actively growing. Avoid winter dormancy (roots won’t form) or extreme heat (stresses cuttings). If you miss this window, semi-hardwood cuttings (from new growth but slightly woody) in late summer can still work with extra care.
Why did my redbud cutting turn yellow or wilt?
Yellowing leaves often signal overwatering or root rot, while wilting can mean underwatering or stress. Check the soil—it should stay moist but not soggy. Improve airflow by spacing cuttings apart, and avoid direct sunlight until roots establish. If mold appears, reduce humidity and treat with fungicide.
Can I grow a redbud from a store-bought tree’s branches?
Yes! Nursery trees (even potted ones) often have healthy branches for cuttings. Look for non-flowering shoots (1/4–1/2 inch thick) with 3–4 leaves. Just avoid branches treated with pesticides—rinse them first. Pro tip: Smaller cuttings root faster than thick, woody ones!
Wrapping up and next steps
Starting a redbud tree from a cutting using the layering trick is a rewarding way to propagate this stunning spring bloomer—and you’ve got all the tools to succeed! 🌱 With patience, the right timing, and a little care, you’ll watch those roots develop in just six weeks.
Once your cutting takes root, transplant it into the ground or a larger pot to give it room to thrive.
Now that you’re ready to try it, grab your supplies and get layering! Share your progress with fellow gardeners or explore more propagation tips—your green thumb is about to grow even stronger. Happy planting! 🌸