
Planting
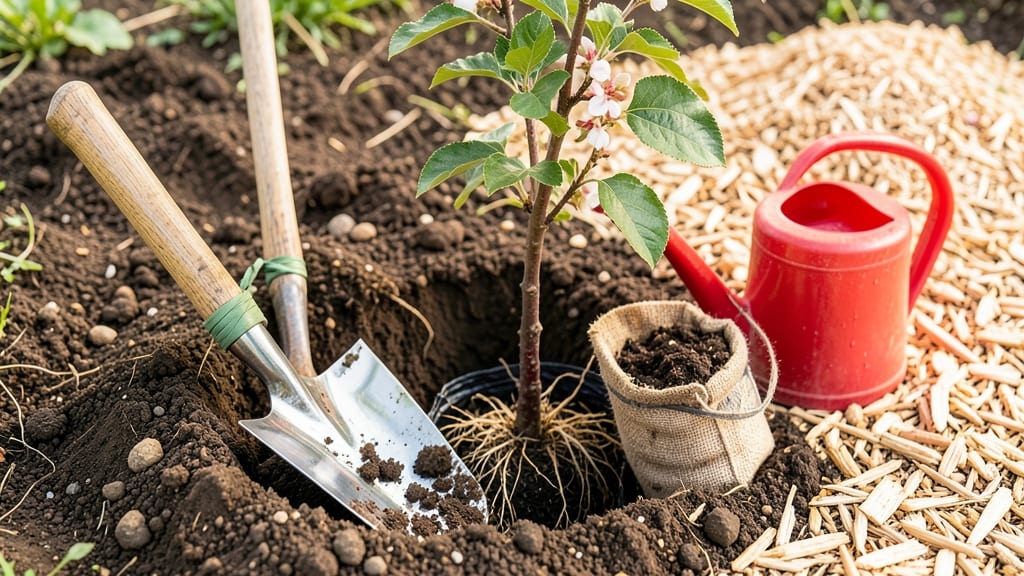
Planting an apple tree step by step isn't as tricky as it seems—my first tree is now five years old and loaded with fruit. 🌳 The secret lies in choosing the right spot, prepping the soil, and giving it the care it needs from day one.
Most people rush the prep work, but taking your time here means fewer struggles down the road.
You’ll need a dwarf or semi-dwarf variety (like 'Honeycrisp' or 'Gala') for smaller spaces, basic tools (shovel, pruners, mulch), and a well-draining spot with at least 6 hours of sun daily.
The soil should be loose and rich—amend with compost if yours is heavy clay. A 2-3 foot deep hole is ideal, just wide enough to fit the roots without crowding.
Once planted, water deeply to settle the soil, then mulch around the base to retain moisture and block weeds. Prune any damaged branches and shape the tree lightly to encourage strong growth. Within 2-4 years, you’ll see blossoms, and with patience, a harvest that’ll make your neighbors jealous.
This method works for backyard orchards, urban lots, or even large containers—just adjust spacing and support as needed. The key is consistency: water when the top inch of soil is dry, and fertilize lightly in early spring. You’ve got this!
📚 In This Guide
- What you need
- Instructions
- Tips and common mistakes
- Wrapping up and next steps
What you need
- ● Apple tree sapling: Choose a bare-root or potted variety (dwarf, semi-dwarf, or standard) based on your space. Pro tip: 💡 Pick disease-resistant cultivars like ‘Honeycrisp’ or ‘Fuji’ for beginners!
- ● Shovel: A rounded-point or digging shovel (18–24 inches long) for digging the hole.
- ● Garden fork: For loosening soil and breaking up compacted areas.
- ● Compost or well-aged manure: 5–10 gallons to enrich the planting hole.
- ● Organic mulch: 2–3 inches of wood chips or straw to retain moisture and suppress weeds.
- ○ Stake (optional but recommended): A 5–6 ft wooden or metal stake + soft tree tie (to secure young trees in windy areas).
- ● Watering can or hose: With a gentle spray nozzle for deep watering.
- ● Pruning shears: Bypass-style (sharp, clean, and sanitized with rubbing alcohol).
- ○ Fertilizer (optional): A balanced 10-10-10 or fruit-tree-specific fertilizer (follow package instructions).
- ● Sunlight: A full-sun spot (6+ hours of direct light daily).
- ● Soil test: Check pH (ideal: 6.0–7.0). Adjust with lime (if too acidic) or sulfur (if too alkaline).
- ● Spacious hole: Dig a hole twice as wide as the root ball (or spread-out roots) but no deeper than the root flare.
- ● Weather window: Plant in early spring (before buds swell) or late fall (6+ weeks before frost).
Step-by-Step guide to planting an apple tree
Here's my foolproof method for establishing a healthy, productive apple tree that bears fruit for decades.
🌱 Step 1: Choose and Prepare the Planting Site
Select a location with full sun exposure (6-8 hours daily) and well-draining soil. Apple trees need space—plant at least 20 feet from buildings or fences and 30 feet from other fruit trees to prevent disease spread. Test your soil pH (ideal range: 6.0-7.0); amend with lime if needed to raise pH or sulfur to lower it.
Dig a hole twice as wide as the root ball but only as deep. Loosen the sides of the hole with a shovel to encourage root spread. Avoid compacting the native soil—this creates air pockets that roots can't penetrate. If your soil is heavy clay, mix in 2-3 inches of compost around the hole's edges to improve drainage.
🪴 Step 2: Remove the Tree from Its Container and Inspect Roots
Gently squeeze the container sides to loosen the root ball before removing the tree. If roots are circling tightly (a common nursery issue), use a sharp knife to make 2-3 vertical cuts through the root mass to encourage outward growth. Trim any broken or blackened roots with clean pruners—these won't recover and will rot in the ground.
Check the root flare (the swollen area where roots meet the trunk). This should sit 2-3 inches above the finished soil line—burying it too deep suffocates the tree. If the container was too deep, you may need to remove extra soil from the root ball before planting. Handle the tree by its root ball, never the trunk, to prevent bark damage.
☀️ Step 3: Position and Backfill the Hole
Place the tree in the hole so the root flare is at the correct height, then backfill with the native soil you removed. Tamp down gently in layers to eliminate air pockets without compacting the roots. Water thoroughly to settle the soil—this helps identify any low spots that need additional soil.
Create a 4-inch deep watering basin around the tree by mounding soil outward. This directs irrigation to the roots. Mulch with 2-3 inches of wood chips, keeping it 6 inches away from the trunk to prevent rot. Water deeply again until the soil 12 inches down is thoroughly moist—this encourages roots to grow downward where they'll find stability.
✂️ Step 4: Prune for Structure and Health
Remove any broken, crossing, or diseased branches with clean pruners. Open the canopy slightly by cutting back 25% of the tree's height to reduce transplant shock and encourage a strong framework. Make cuts just outside the branch collar (the swollen area where the branch meets the trunk)—never leave stubs, as they invite disease.
If your tree has a central leader (main upward-growing branch), ensure it's dominant. Remove competing leaders to avoid a weak, multi-trunked tree. Seal any large cuts (>1/4 inch) with pruning sealant to prevent moisture loss and infection. Avoid over-pruning—your goal is to shape, not drastically reduce foliage.
💧 Step 5: Establish a Watering and Care Routine
Water 2-3 times per week for the first year, providing 10-15 gallons per watering to saturate the root zone. Use a soaker hose or drip irrigation to avoid wetting the foliage, which spreads fungal diseases. Check soil moisture by sticking your finger 3 inches down—water when it's dry but not powdery.
Fertilize lightly in spring with a 10-10-10 balanced fertilizer, applying 1/2 cup per inch of trunk diameter. Avoid high-nitrogen fertilizers—they promote leafy growth at the expense of fruit production. Monitor for pests like aphids or mites; treat with horticultural oil if needed. Apple trees won't bear fruit for 3-5 years, but proper care now ensures a productive tree for decades.
Tips & tricks for planting an apple tree
A few simple strategies will help your apple tree thrive from day one and set the stage for decades of fruit production.
Site Selection Wisdom: That 6-8 hours of full sun requirement isn't just about light—it's about temperature regulation. Southern exposure in the Northern Hemisphere gives you the warmest microclimate, while avoiding afternoon shade from nearby structures. I've planted in partial shade before and noticed the fruit developed unevenly—always prioritize that southern exposure if possible. The 20-foot spacing from buildings isn't arbitrary either; it prevents moisture buildup against walls that can lead to fungal issues.
Root System Care: When you make those 2-3 vertical cuts in circling roots (Step 2), think of it as giving your tree's roots a fresh start. I use a clean, sharp knife to make clean cuts—never tear the roots. For the root flare position, imagine a small hillock where the trunk meets the soil; that's exactly what you want to see after planting. The 2-3 inch elevation above soil line creates proper airflow at the base and prevents water pooling that causes rot.
Watering Technique: That 12-inch deep soil moisture check in Step 3 is crucial—it tells you whether your watering is actually reaching the roots. I've seen people water lightly and think the tree is getting enough, only to find the top 3 inches moist while the rest stays dry. Use a soil probe or long screwdriver to verify depth. The 4-inch watering basin creates a natural funnel that directs water exactly where it needs to go, rather than spreading out and evaporating.
Pruning Precision: The 25% height reduction in Step 4 might sound dramatic, but it's actually conservative. I've watched trees with minimal pruning develop weak branch structures that can't support heavy fruit loads. When making cuts, visualize the branch collar as a natural bandage—cutting just outside it maintains the tree's natural healing response. For those large cuts over 1/4 inch, I use a high-quality pruning sealant that contains mycorrhizal fungi to promote faster healing.
Pro Tips for Plant An Apple Tree Step By Step
- A few simple strategies will help your apple tree thrive from day one and set the stage for decades of fruit production.
- Site Selection Wisdom: That 6-8 hours of full sun requirement isn't just about light—it's about temperature regulatio...
- Root System Care: When you make those 2-3 vertical cuts in circling roots (Step 2), think of it as giving your tree's...
Frequently asked questions
Got questions about planting your apple tree? You’re not alone! Here are answers to the most common concerns to help you grow a thriving orchard.
When is the best time to plant an apple tree?
The ideal time is late fall or early spring—when the tree is dormant but soil is workable. This gives roots time to establish before extreme heat or cold. Avoid planting in summer or during frost, as stress can harm young trees.
Can I plant an apple tree in a container or small yard?
Yes! Dwarf or semi-dwarf varieties (like ‘Columnar’ or ‘Spindle’) thrive in containers or tight spaces. Use a 5-gallon pot or larger, with well-draining soil and regular watering. Just ensure it gets 6+ hours of sunlight daily—apples need space to grow!
How do I protect my apple tree from pests or frost?
Use frost cloth in early spring or wrap the trunk with burlap to shield it from cold snaps. For pests, apply neem oil or insecticidal soap early in the season. Prune regularly to improve airflow and reduce disease risks.
How long until my apple tree bears fruit?
Dwarf trees may fruit in 2–4 years, while standard trees take 5–7 years. Patience is key! Ensure proper pollination (plant two compatible varieties) and consistent care—healthy trees reward you with sweet harvests.
What if my apple tree leaves turn yellow or wilt?
Yellow leaves often signal overwatering, nutrient deficiency, or fungal issues. Check soil moisture (keep it evenly moist but not soggy) and test pH (ideal: 6.0–7.0). If spots appear, prune affected branches and treat with copper fungicide.
Wrapping up and next steps
Planting an apple tree is a rewarding journey that combines patience, care, and a touch of magic—watching a tiny sapling grow into a fruit-bearing giant! 🌱 By following these five simple stages, you’ve set the foundation for a thriving tree, delicious harvests, and maybe even a future for sharing apples with neighbors.
Remember, every expert gardener started with their first seedling!
Now that you’re ready to dig in, take the next step: research the best apple varieties for your climate or sketch a rough layout for your orchard. Whether you’re planting one tree or a small grove, your green thumb is already on the right track—keep nurturing it! 🍏✨