
Pruning
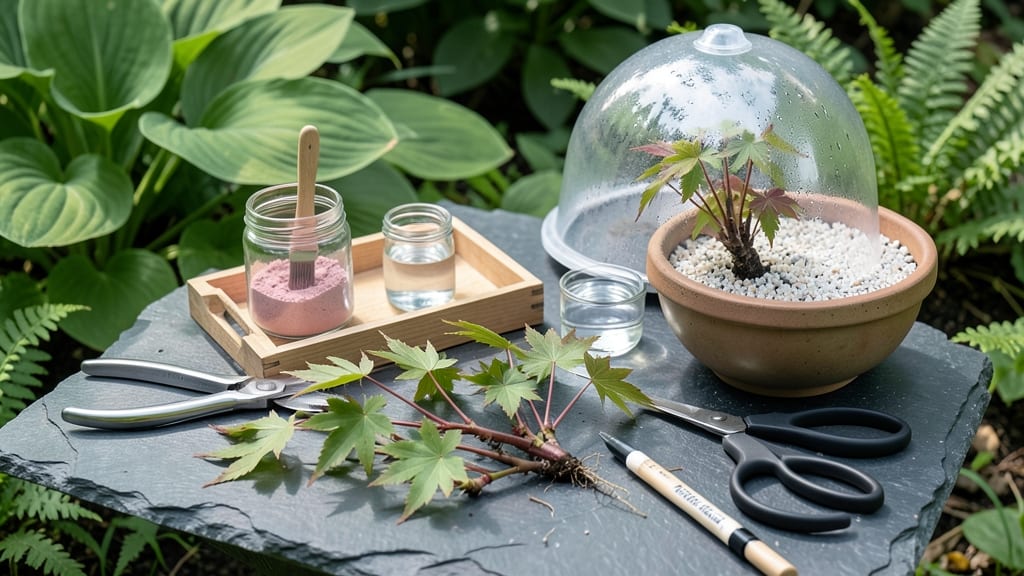
Japanese maple tree cuttings let you grow a stunning new tree from a single branch—simple enough for beginners but rewarding enough to feel like magic. 🌿 I’ve propagated my own from store-bought saplings, and the secret isn’t complicated: timing, clean cuts, and patience.
Most people fail because they rush the rooting process, but with the right approach, you’ll see roots in just 4-6 weeks. The key is taking 4-6 inch semi-hardwood cuttings in late spring or early summer when new growth has matured but hasn’t hardened off yet.
Use sharp pruners to make clean cuts just below a leaf node, then strip the lower leaves to expose the stem for rooting.
Whether you root in water or moist soil, the goal is to keep humidity high and light indirect—think of it like creating a mini greenhouse for your cutting. Once roots form, you’ll notice new growth at the top, signaling success.
Transplant carefully into well-draining soil, and within a year, you’ll have a tree that keeps the delicate lace-like foliage and vibrant colors of its parent. The best part? You’re preserving the exact variety you love, whether it’s ‘Bloodgood’ red or ‘Emperor I’ purple.
Common mistakes include overwatering (which rots cuttings) or using cuttings that are too soft or too woody. Stick to the 4 simple steps, and you’ll avoid these pitfalls. Here’s how to do it right—no green thumb required!
📚 In This Guide
- What you need
- Instructions
- Tips and common mistakes
- Wrapping up and next steps
What you need
- ● Japanese Maple Cuttings: 4–6 healthy, semi-hardwood cuttings (4–6 inches long, pencil-thick). Choose from non-flowering stems.
- ○ Rooting Hormone: 1 small bottle (e.g., Clonex or Rootone). Optional but highly recommended for faster rooting.
- ● Sharp Pruning Shears: Clean, sterilized shears (or a bypass pruner) to make clean cuts.
- ● Well-Draining Potting Mix: 1 bag (5–10 quarts) of a perlite-to-peat moss or cactus/succulent mix (avoid garden soil—it’s too dense!).
- ● Small Pots or Trays: 4–6 individual pots (3–4 inches deep) or a single seedling tray with drainage holes.
- ● Plastic Bag or Clear Lid: To create a humidity dome (e.g., a ziplock bag with holes or a plastic propagator).
- ● Spray Bottle: 8–16 oz with water for misting (keep cuttings hydrated!).
- ● Labeling Tags: 4–6 small tags + pencil to track varieties.
- ● Heating Mat: A seedling heat mat (set to 70–75°F) to encourage root growth in cooler climates.
- ● Fogger System: For high-humidity environments (great for humidity-loving maples!).
- ● Anti-Fungal Spray: Like Neem Oil (prevents mold if humidity gets too high).
- ● Grow Lights: LED or fluorescent lights (12–16 hours/day) if natural light is limited.
Step-by-step instructions for propagating Japanese maple cuttings
Here's my foolproof method for growing new Japanese maples from cuttings—no fancy tools or green thumbs required.
🌿 Step 1: Select and Prepare Healthy Cuttings
Choose 4-6 inch semi-hardwood cuttings from new growth in late spring or early summer. The stems should be pencil-thick and have 2-3 leaf sets—this gives your cutting both energy for rooting and leaves for photosynthesis. Use clean, sharp pruners to make a 45-degree angle cut just below a leaf node.
Remove all but the top 2-3 leaves to reduce water loss. If the leaves are large, trim them in half to further minimize stress. I like to dip the cut end in rooting hormone (optional but helpful for faster results), then let it sit for 10-15 minutes to dry the wound slightly—this prevents rot once planted.
🪴 Step 2: Plant Cuttings in Moistened Growing Medium
Fill a small pot (4-6 inches deep) with a well-draining mix—I use equal parts perlite and peat moss for air circulation and moisture retention. Moisten the mix until it feels damp like a wrung-out sponge, but not soggy. Push each cutting 2 inches deep into the soil at a slight angle, leaving just the top leaves exposed.
Gently firm the soil around the base to eliminate air pockets, which can trap moisture and cause rot. Place a clear plastic bag loosely over the pot to create a humid microclimate—Japanese maples love humidity but hate sitting in water. Secure the bag with a rubber band and place the pot in bright, indirect light (no harsh sun yet).
☀️ Step 3: Maintain Ideal Conditions for Rooting
Keep the medium consistently moist—water when the top inch feels dry to touch, but avoid letting the cuttings sit in water. Mist the leaves every 2-3 days to maintain humidity inside the bag. In 6-8 weeks, you’ll see new growth at the top—this means roots are forming below.
Once roots establish (test by gently tugging—resistance means success), remove the plastic bag gradually over 5-7 days to harden off the cutting. Move it to morning sun for 1-2 hours daily, increasing exposure over 2 weeks before transplanting outdoors. Real talk: Patience here prevents transplant shock.
✂️ Step 4: Transplant and Care for New Growth
Choose a partially shaded spot with well-draining soil—Japanese maples hate soggy roots. Dig a hole twice as wide as the root ball but only as deep as it was in the pot. Water deeply before transplanting to reduce stress. After planting, water every 2-3 days until established, keeping the soil evenly moist but not waterlogged.
Fertilize lightly 4-6 weeks after transplanting with a balanced, slow-release fertilizer to encourage strong growth. Watch for new leaves—this confirms the cutting has fully adapted. In 1-2 years, your cutting will mature into a sturdy young tree with the signature lace-like foliage of Japanese maples.
Tips & tricks for perfect Japanese maple tree cuttings
Here's what nobody tells you about making your cuttings thrive from the very start.
The Timing Secret: Late spring or early summer is your golden window for success. That's when Japanese maples produce semi-hardwood cuttings—neither too soft nor too woody. Look for new growth that's still flexible but has started to mature. I always check for the telltale pencil-thickness and those 2-3 leaf sets—those leaves are your cutting's energy source for rooting. The 10-15 minute drying period after cutting is crucial too—it's the difference between rot and healthy root development.
Rooting Hormone Hack: While rooting hormone isn't strictly necessary, it can double your success rate. If you're using it, dip just the bottom inch of your cutting—no need to go crazy. The key is to let that cut end dry slightly for those 10-15 minutes before planting. This creates a protective barrier that prevents rot when you bury it in the moist medium. Pro move: Tap the cut end gently on the counter to dislodge any excess hormone before planting.
Lighting Strategy: Bright, indirect light is non-negotiable during the rooting phase. Direct sun will scorch those delicate leaves while they're establishing roots. I place my cuttings near an east-facing window where they get morning sun but are shielded from harsh afternoon rays. That gradual transition to morning sun after rooting (starting with just 1-2 hours) is what prevents transplant shock. Think of it as a gentle introduction to the outdoors.
Transplanting Wisdom: When you're ready to transplant, dig that hole twice as wide but only as deep as the root ball. This gives roots room to spread without being buried too deep. The 4-6 week wait before fertilizing is important—you want those new roots to establish before adding nutrients. I always water deeply before transplanting to reduce stress, then keep the soil consistently moist (not soggy) for the first few weeks. That's when your cutting is most vulnerable to shock.
Pro Tips for Japanese Maple Tree Cuttings
- Here's what nobody tells you about making your cuttings thrive from the very start.
- The Timing Secret: Late spring or early summer is your golden window for success. That's when Japanese maples produce...
- Rooting Hormone Hack: While rooting hormone isn't strictly necessary, it can double your success rate. If you're usin...
Frequently asked questions
Got questions about propagating Japanese maple tree cuttings? You’re not alone! Here are answers to the most common concerns—so you can grow your own stunning tree with confidence.
When is the best time to take Japanese maple cuttings?
The ideal window is late winter to early spring (just before new growth starts). You can also try early summer (June–July) for semi-hardwood cuttings, but success rates drop slightly. Avoid taking cuttings in extreme heat or cold—consistency is key!
How do I know if my cutting will root successfully?
Look for healthy, pencil-thick stems with 2–3 sets of leaves and a 45-degree angle cut just below a node. Avoid woody or diseased branches—soft, green growth roots best! Dip in rooting hormone (optional but helpful) and keep humidity high for best results.
Why aren’t my Japanese maple cuttings rooting?
Common culprits: low humidity (try a plastic bag or propagator), overwatering (let soil stay moist, not soggy), or poor light (bright, indirect light speeds growth). If leaves yellow or wilt, check for root rot or pests—adjust care and monitor closely!
Can I propagate Japanese maple from seeds instead of cuttings?
While possible, seed-grown maples take years to mature and rarely retain the parent tree’s vibrant colors or unique traits. Cuttings are the fastest, most reliable method for growing a true-to-form Japanese maple. Save seeds for experimental fun—but expect patience!
What’s the easiest Japanese maple variety for beginners?
Start with ‘Bloodgood’ or ‘Emperor I’—they’re hardy, fast-rooting, and forgiving of minor mistakes. Avoid delicate varieties like ‘Shishigashira’ (weeping types) for your first try. Always check the maturity of your tree—mature wood (1–2 years old) roots better than fresh growth!
Wrapping up and next steps
Growing a stunning Japanese maple from cuttings is simpler than you think—just follow these four steps, and you’ll be nurturing a breathtaking tree in no time! 🌿 Whether you’re a seasoned gardener or a beginner, patience and care will reward you with vibrant foliage and a sense of accomplishment.
Now that you’re armed with the right knowledge, take the plunge—grab your cuttings, gather your supplies, and start your green-thumb journey today!
Ready to turn your vision into reality? Pick a sunny spot, keep those roots moist, and watch your Japanese maple thrive!