
Pruning
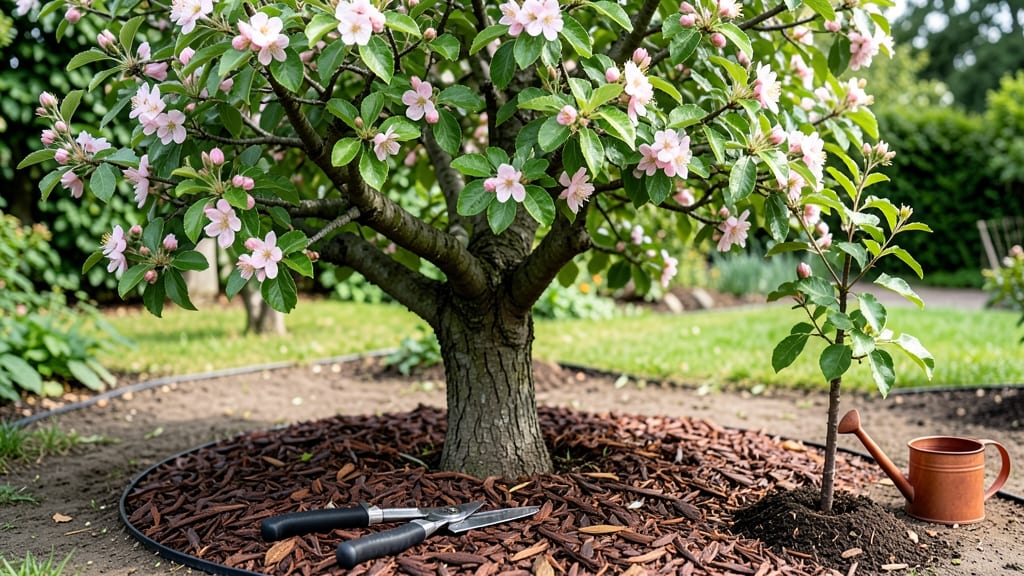
Spring is when your apple tree wakes up from winter dormancy—and apple tree care in spring determines whether you’ll have a harvest or just a pretty branch. I’ve spent years watching my tree go from bare branches to blossoms, and the first few weeks after frost are critical.
Skip this window, and you’ll miss the chance to shape the tree’s future fruit production.
The key moves are simple but non-negotiable: prune to open the canopy for sunlight, fertilize to fuel new growth, and scout for pests before they get a foothold.
I use sharp loppers, a balanced fertilizer (10-10-10), and a magnifying glass to check for mites—tools that sound basic but make all the difference. Timing matters too: prune when buds swell but before leaves burst, or you’ll encourage disease.
By summer, you’ll see the payoff—strong branches heavy with blossoms, not just leaves. The tree will resist pests better, fruit will develop more evenly, and next year’s harvest will be 20-30% larger than if you’d waited.
This isn’t just about trimming; it’s about setting up your tree for success when the weather turns warm.
Works for young saplings or mature trees, in backyards or orchards. The same principles apply whether you’re in Zone 5 or 8—just adjust timing for your last frost date. Here’s how to do it right the first time.
📚 In This Guide
- What you need
- Instructions
- Tips and common mistakes
- Wrapping up and next steps
What you need
- ● Pruning shears: Sharp, bypass-style shears (for cuts up to ½ inch thick). Pro tip: Disinfect blades with rubbing alcohol to prevent disease spread! 💡
- ● Loppers: For thicker branches (½ to 1½ inches). Look for bypass blades for cleaner cuts.
- ● Pruning saw: For branches over 1½ inches thick. A curved-tooth saw minimizes tear-out.
- ● Gloves: Heavy-duty, cut-resistant gloves to protect hands from thorns and rough bark.
- ● Ladder: Sturdy, extendable ladder (16–24 ft) for tall trees. Safety first! 🚧
- ○ Pruning sealant: Optional but helpful for sealing large cuts (over ½ inch) to prevent pests/disease.
- ● Disposable bags or bucket: For collecting debris (5+ gallon capacity).
- ● Tree wound paint: Controversial but some swear by it for sealing cuts.
- ● Pole saw: For high branches if you’re avoiding ladders.
- ● Marking spray: To tag branches for removal (non-toxic, water-based).
- ● First-aid kit: Just in case thorns or tools take a toll! 🩹
- ● Weather: Prune on a dry, cloudy day (avoid frost or rain within 24 hours).
- ● Safety gear: Eye protection (goggles) and closed-toe shoes.
- ● Tree knowledge: Familiarize yourself with your tree’s age, size, and variety (e.g., dwarf vs. standard).
- ● Clean workspace: Lay down tarps or old sheets to catch debris easily.
Step-by-step guide to spring pruning for healthy apple trees
Spring is the perfect time to shape your apple tree and set it up for a productive year.
Inspect the Tree for Winter Damage
Start by examining the entire tree for signs of winter damage or disease. Look for dead, broken, or crossed branches that may have been damaged by ice, snow, or strong winds. These branches are often brown, brittle, and may have no leaves or buds. I always use a pair of sharp pruning shears to test a branch—if it snaps easily, it's dead and needs removal.
Check for any signs of fungal diseases like cankers, which appear as sunken, discolored areas on the bark. If you find any, mark these branches for removal to prevent the spread of disease. Healthy branches will have smooth bark and plump buds ready to open in spring. This inspection ensures you only prune what's necessary, leaving the healthy structure intact.
Remove Dead, Diseased, and Crossing Branches
Begin by cutting out any dead, diseased, or crossing branches first. These branches compete for nutrients and can weaken the tree's overall health. Use clean, sharp pruning shears to make cuts just outside the branch collar—the swollen area where the branch meets the trunk. This ensures proper healing and prevents damage to the tree.
For larger branches, use a pruning saw to avoid tearing the bark. Always make your cuts at a slight angle to allow water to run off, reducing the risk of rot. I like to work from the bottom up, removing lower branches first to improve airflow and sunlight penetration. This step is critical for maintaining the tree's vigor and preventing future issues.
Thin Out Overcrowded Branches
Next, focus on thinning out the canopy by removing branches that are growing too close together. These branches create shaded areas where fruit may not ripen properly and where diseases can thrive. Aim to space branches about 6-12 inches apart to allow for good airflow and sunlight exposure. This step encourages stronger growth and better fruit production.
When thinning, prioritize branches that are growing inward or downward, as these are less productive. Make your cuts just above an outward-facing bud to encourage new growth in the right direction. Avoid removing more than 25% of the tree's foliage in one season to prevent stress. You'll see a noticeable improvement in fruit quality and tree health within a year.
Shape the Tree for Optimal Growth
Now, shape the tree by selecting strong, healthy branches to form the main structure. Choose branches that are well-spaced and growing outward at a 45-60 degree angle from the trunk. These branches will form the scaffold for future growth. Remove any branches that are too vertical, as they can become weak and break under the weight of fruit.
For young trees, focus on developing a strong central leader and well-distributed side branches. For older trees, maintain the existing structure while removing any water sprouts—fast-growing, vertical shoots that drain energy from the tree. This shaping step ensures the tree remains balanced and productive for years to come.
Clean Up and Apply Protective Measures
After pruning, clean up all debris and dispose of it properly to prevent the spread of disease. Sterilize your pruning tools with rubbing alcohol or a 10% bleach solution to kill any lingering pathogens. This step is often overlooked but is essential for keeping your tree healthy.
Finally, apply a thin layer of dormant oil spray or copper fungicide to protect the tree from pests and diseases as it enters the growing season. Water the base of the tree deeply to help it recover from pruning stress. With these final steps, your apple tree is now ready to thrive and produce a bountiful harvest.
Tips & tricks for perfect spring apple tree pruning
These simple strategies will help you prune like a pro and set your apple tree up for a fantastic harvest.
Timing is Everything: Prune in early spring, just as buds begin to swell but before they open. This timing allows the tree to heal quickly and prepares it for the growing season. Avoid pruning too early in winter when the tree is dormant, as this can expose it to frost damage. If you missed early spring, wait until late spring after flowering, but don't delay too long—summer pruning stresses the tree.
Tool Sharpness Matters: Always use sharp, clean pruning shears and saws—dull tools crush branches instead of making clean cuts. I learned this the hard way after ruining several cuts with a dull blade. Test your tools before starting: if they struggle to cut through a pencil, they're not sharp enough. Sterilize them with rubbing alcohol or a 10% bleach solution between cuts to prevent spreading disease from infected branches.
Visual Cues for Better Cuts: When making cuts in Step 2 and Step 4, look for the branch collar—the swollen area where the branch meets the trunk. Make your cut just outside this collar at a slight angle to allow water to run off. For larger branches, use the three-cut method: make an undercut, then a top cut, and finally remove the branch cleanly. This prevents bark tearing and promotes faster healing.
Pruning Stress Prevention: Never remove more than 25% of the tree's foliage in one season, as this can shock the tree. In Step 3, focus on thinning rather than topping—removing entire branches is better than cutting back into old wood. After pruning, water deeply to help the tree recover. I always schedule a good soaking right after finishing, especially if we've had dry weather.
Pro Tips for Apple Tree Care In Spring
- These simple strategies will help you prune like a pro and set your apple tree up for a fantastic harvest.
- Timing is Everything: Prune in early spring, just as buds begin to swell but before they open. This timing allows the...
- Tool Sharpness Matters: Always use sharp, clean pruning shears and saws—dull tools crush branches instead of making c...
Frequently asked questions
Got questions about spring apple tree care?
You’re not alone! Here are answers to the most common concerns to help you nurture a thriving orchard.
When is the best time to prune apple trees in spring?
The ideal window is late winter to early spring (just before buds swell but after dormancy). For most regions, this means February through March. Avoid pruning too early—frost can stress fresh cuts—or too late, which may encourage new growth vulnerable to pests. Pro tip: Check your local frost dates for precision!
How much should I trim an apple tree in spring?
Remove 15–25% of the tree’s total growth to balance shape, airflow, and sunlight. Focus on:
- Dead, diseased, or crossing branches
- Suckers (shoots at the base)
- Water sprouts (vertical shoots)
Should I treat my apple tree for pests or diseases before pruning?
Yes! Prune first, then apply treatments like dormant oil (for mites/scale) or copper fungicide (to prevent scab/fire blight). Timing matters: Treat before buds open (late winter) to catch overwintering pests. Avoid harsh chemicals near bloom—wait until after flowering if needed.
Will pruning reduce my apple harvest?
Not if done correctly! Pruning increases fruit quality by improving airflow (reducing disease) and sunlight (sweeter apples). However, over-pruning can stress the tree, leading to fewer fruits. Focus on structural health—a well-pruned tree rewards you with bigger, juicier apples over time.
Can I use hedge trimmers instead of pruning shears?
Hard pass! Hedge trimmers cause ragged cuts that invite disease and pests. Use sharp bypass pruners (for branches <½” thick) or a pruning saw for thicker limbs. Clean tools with rubbing alcohol between cuts to prevent spreading pathogens. Precision = happier trees!
Wrapping up and next steps
Spring is the perfect time to give your apple tree the care it needs to thrive—and with the right techniques, you’ll be rewarded with abundant, delicious fruit later in the season! 🍏 By pruning for light and airflow, fertilizing wisely, and monitoring for pests, you’re setting the stage for a healthy, productive tree.
Remember, consistency is key, so check in regularly as the season progresses.
Ready to take the next step? Grab your pruners and head to the orchard! If you’re new to pruning, start with small branches and observe how your tree responds.
For deeper guidance, consider watching a few tutorial videos or joining a local gardening group—your apple tree (and future pies) will thank you!