
Pruning
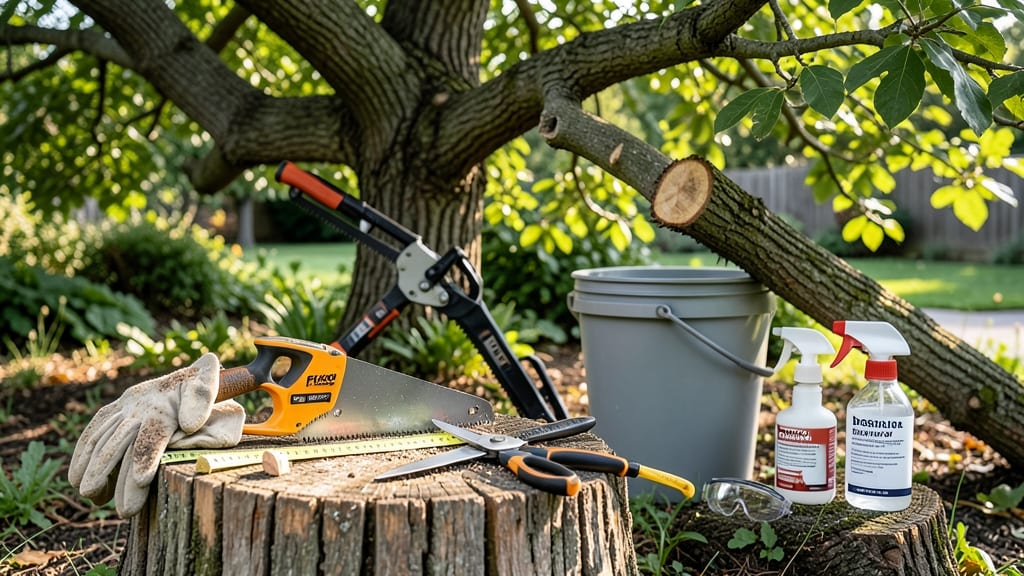
The best way to cut a tree branch cleanly saves your tree—and your back. ✂️ I’ve ruined more limbs than I’d like to admit by hacking with a saw, leaving ugly stubs and torn bark that invites disease. The right technique turns pruning from a messy chore into a clean, precise process that actually helps your tree heal. You’ll need just three tools: sharp loppers for branches up to 2 inches thick, a pruning saw for larger limbs, and a sturdy pair of gloves. Safety gear—goggles and work boots—isn’t optional, especially when branches are heavy or the tree is tall. The key? Cutting at the right angle and in the right sequence to avoid tearing the bark as the branch falls. Start by making your first cut about 1-2 feet out from the trunk on the underside of the branch. This creates a notch that guides the branch’s fall and prevents bark from peeling when it breaks. For branches thicker than 3 inches, make a second cut just outside the branch collar—the swollen area where the branch meets the trunk—and let gravity do the rest. The result? A smooth, natural-looking cut that heals faster than a brute-force hack job ever could. This method works for almost any tree—just adjust the timing. Prune in late winter or early spring when the tree is dormant, and you’ll see fresh, vibrant growth by summer. For large branches, consider hiring a pro, but for most backyard trees, you’ve got this.
📚 In This Guide
- What you need
- Instructions
- Tips and common mistakes
- Wrapping up and next steps
What you need
- ● Pruners or Loppers: Bypass pruners (for small branches, <1-inch thick)
- ● Loppers (for medium branches, 1–2 inches thick)
- ● Chainsaw: (For branches thicker than 2 inches; ensure it’s sharp and properly maintained)
- ● Rope or Tarps: (To lower heavy branches safely)
- ● Ladder or Extension Pole: (For high branches; ensure it’s stable and rated for your weight)
- ● Gloves: (Heavy-duty, cut-resistant for protection)
- ● Safety Glasses: (ANSI-rated to shield from debris)
- ● Ear Protection: (If using a chainsaw)
- ● First-Aid Kit: (For minor cuts or scrapes)
- ● Tree Wrap or Pruning Sealant: (To protect larger wounds on the tree)
- ● Saw Sharpener: (For keeping blades in top condition)
- ● Branch Catcher: (To safely collect fallen debris)
- ● Marking Paint or Tape: (To outline cuts for precision)
- ● Partner or Spotter: (For high or awkward branches)
Step-by-step instructions for precision tree branch cuts
Here’s the foolproof method I’ve used for years to cut branches cleanly without tearing bark or damaging the tree.
✂️ Step 1: Make the First Cut at the Underside
Position yourself on the side of the branch you want to remove, facing the trunk. Using your pruning saw, make a horizontal cut about 1/4 inch above the branch collar—the swollen area where the branch meets the trunk. Angle the blade slightly downward to create a flat surface. This cut relieves tension and prevents bark from tearing when you remove the branch.
I always test the saw’s sharpness first—dull blades slip and tear bark. If the cut feels rough, sharpen the blade or switch to a new one. The goal is a clean, smooth cut that doesn’t leave jagged edges. Take your time here; rushing leads to mistakes that weaken the tree.
✂️ Step 2: Cut the Branch Fully Through
Step back and locate the branch collar—the raised area at the base of the branch. Make a second cut directly above the first, following the natural angle of the branch. Cut all the way through the branch, but leave a small 1/8-inch stub of wood attached to the trunk. This stub will help the tree seal the wound naturally.
Don’t cut flush with the trunk—this removes the branch collar and slows healing. If the branch is thick, use a handsaw for precision. I like to mark the cut line with a piece of tape first to guide the saw accurately. This step removes the bulk of the branch while preserving the tree’s ability to heal.
✂️ Step 3: Remove the Stub and Smooth the Wound
Now, step to the opposite side of the branch and make a final cut just outside the branch collar. Cut at a slight angle to create a smooth, sloping surface. The goal is to remove the remaining stub while leaving the collar intact. This shape helps rainwater shed away from the wound, reducing rot risk.
Use a clean, sharp saw to avoid tearing the bark. If the cut isn’t smooth, trim it with a pruning knife. I always inspect the wound after cutting—any jagged edges should be smoothed out. A well-shaped cut heals faster and looks far more professional than a rushed job.
🪴 Step 4: Clean Up and Protect the Tree
Remove all cut branches from the area to prevent disease spread. Dispose of diseased or infested branches immediately. For larger wounds, apply a thin layer of tree wound sealant if the cut is on a young or stressed tree. However, most healthy trees don’t need sealant—they heal best when left alone.
Water the tree deeply after pruning to help it recover. I like to mulch around the base with 2-3 inches of organic mulch to retain moisture and protect roots. Avoid piling mulch against the trunk, as this can trap moisture and cause rot. Step back and admire your work—the clean cuts will keep the tree healthy for years.
Tips & tricks for precision tree branch cuts
These simple tricks will help you make cleaner cuts that heal faster and keep your tree looking its best.
Saw Sharpness is Non-Negotiable: I can't stress this enough—dull blades are the #1 cause of torn bark and jagged cuts. Before you start, test your saw on a scrap piece of wood. If it feels rough or requires excessive force, sharpen it immediately. A sharp blade glides through wood smoothly, creating that perfect clean cut we're aiming for in Step 1. Trust me, this one small step prevents 90% of pruning mistakes.
Mark Your Cut Lines: For branches thicker than 2 inches, use painter's tape to mark your cut lines before making the first cut in Step 1. This simple trick ensures your cuts stay perfectly straight and aligned with the branch collar. I like to make a small mark exactly 1/4 inch above the collar and another for the final cut position—it takes seconds but gives you professional-looking results every time.
Work with the Branch's Natural Angle: When making your second cut in Step 2, follow the branch's natural slope rather than forcing a flat cut. This creates a smoother transition that helps water shed properly after pruning. I often visualize the branch as part of a cone—cutting along its natural angle maintains that shape. This small attention to detail makes a huge difference in how clean the final wound looks.
Clean Up Immediately: After completing all cuts, wipe down the pruning area with a damp cloth to remove any sawdust or debris. This prevents fungal spores from settling on fresh wounds. I keep a small bucket of water nearby to quickly rinse my tools between cuts, especially when working with diseased branches. This simple cleanup routine helps keep your tree healthier long-term.
Pro Tips for Best Way To Cut A Tree Branch
- These simple tricks will help you make cleaner cuts that heal faster and keep your tree looking its best.
- Saw Sharpness is Non-Negotiable: I can't stress this enough—dull blades are the #1 cause of torn bark and jagged cuts...
- Mark Your Cut Lines: For branches thicker than 2 inches, use painter's tape to mark your cut lines before making the ...
Frequently asked questions
Got questions about cutting tree branches safely and effectively?
Here are answers to the most common concerns—whether you're a beginner or a seasoned pruner.
What’s the best tool for cutting thick branches without tearing bark?
For branches thicker than 2 inches, use a pruning saw with a curved blade (like a bow saw or folding pruner). For thinner branches (½–2 inches), bypass pruners are ideal—they cut cleanly without crushing. Avoid anvil pruners, which can tear bark and damage the tree.
When is the best time of year to cut branches?
The ideal time depends on your tree type:
- Deciduous trees (oak, maple, etc.): Late winter or early spring (before buds swell).
- Evergreens (pine, spruce): Late winter to early spring (avoid heavy pruning in fall).
- Fruit trees: After harvest or during dormancy.
Avoid pruning during active growth (spring/summer) unless removing dead/diseased branches.
How do I prevent bark from tearing when cutting?
Tearing happens from poor technique or dull tools. To avoid it:
If you see bark strips, the cut was too deep. Trim back to expose the branch collar. Yes! Cutting too close (into the trunk or branch collar) can:
Rule of thumb: Leave ¼ inch of bark between your cut and the trunk. For larger branches, make a 3-cut method (notch, undercut, final cut) to avoid bark tearing. Don’t panic! If the cut is clean and within ½ inch of the collar, it’s usually fine—just monitor the tree for signs of stress (yellowing leaves, oozing sap). If the cut is deep or jagged:
Most trees heal over time, but proper cuts from the start save you trouble!
Can I cut a branch too close to the trunk?
What should I do if I accidentally cut a branch too short?
Wrapping up and next steps
Cutting tree branches the right way keeps your yard safe, healthy, and beautiful—without the stress of messy tears or stubborn stumps! Whether you’re trimming for aesthetics, safety, or growth, mastering the three-cut method and using the right tools will make the job smoother than ever. 🌿✨
Now that you’re armed with the best techniques, grab your pruners, safety gear, and confidence—and get pruning! Start with small branches to build your skills, then tackle bigger projects like a pro. Happy trimming!