
Pruning
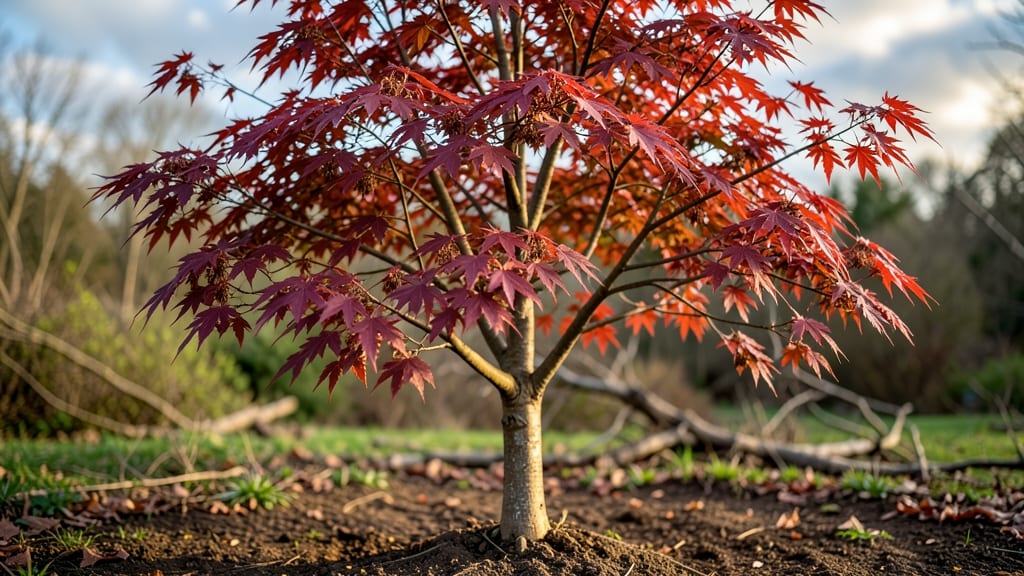
Pruning your red maple tree in early spring—when swollen buds pop like tiny green balloons—sets the stage for a stronger, more vibrant growing season. 🌱 I’ve learned the hard way that timing matters: prune too early, and you risk sap bleeding; wait too long, and you stunt new growth.
The key is acting when those buds swell but before leaves unfurl, usually in late February to early March in most zones. You’ll need sharp pruners (dull blades tear bark), a ladder for higher branches, and a bucket to catch debris.
Look for dead, crossing, or weak branches—these are your first targets. Red maples bleed sap aggressively in spring, so seal larger cuts with pruning sealant to prevent disease entry and speed healing. By the time summer rolls around, you’ll see thicker foliage and fewer weak limbs.
The tree will channel energy into sturdy new growth instead of struggling with structural flaws. Just avoid heavy pruning—stick to light shaping and removal of only what’s necessary. This approach works for both young saplings and mature trees. The goal isn’t perfection—it’s healthier growth and fewer cleanup headaches later.
Grab your tools and let’s get started!
📚 In This Guide
- What you need
- Instructions
- Tips and common mistakes
- Wrapping up and next steps
What you need
- ● Pruning shears: Bypass pruners (for cuts up to ½ inch thick) – look for sharp, stainless-steel blades.
- ● Loppers: 1 pair (for branches ½ to 2 inches thick) – choose ratcheting loppers for ease.
- ● Pruning saw: 1 handheld saw (for branches 2+ inches thick) – curved blade for clean cuts.
- ● Extension pole: 1 (6–10 ft) – helps reach high branches safely.
- ● Disposable gloves: 2–3 pairs (nitrile-coated for grip and protection).
- ● Rubbing alcohol (70%+) or bleach solution: 1 small bottle or spray bottle – for sterilizing tools between cuts.
- ● Heavy-duty trash bags: 2–3 (for collecting debris).
- ○ Ladder (optional): 1 (if tree exceeds 10 ft) – use a sturdy, extendable ladder with stabilizers.
- ● Weather check: Prune on a dry, calm day (avoid rain or wind).
- ● Safety gear: Safety glasses (1 pair) and closed-toe shoes.
- ● Tree health assessment: Inspect the tree for diseased or dead branches before starting.
- ○ Marking tools (optional): Colored tape or flags – to tag branches for removal.
Step-by-step guide to pruning red maple trees in early spring
Early spring is the perfect time to shape your red maple and set it up for vibrant foliage all season.
☀️ Step 1: Time Your Pruning for Optimal Growth
Prune your red maple as soon as buds begin to swell—typically 3-4 weeks before new leaves emerge. This timing ensures the tree can heal wounds before the growing season kicks in. I always check for tight, plump buds as my cue, which usually falls in late February to early March in most climates.
If you wait too long, you risk encouraging suckering (those pesky shoots at the base) or stressing the tree before it’s ready to push new growth. Cold snaps can also delay sap flow, making cuts heal slower. Prune on a dry, calm day when temperatures are above 40°F—this prevents shock and promotes faster recovery.
✂️ Step 2: Gather the Right Tools and Safety Gear
You’ll need clean, sharp pruning tools—a bypass pruner for small branches (up to ½-inch thick) and loppers for thicker stems (up to 2 inches). For anything larger, break out the pruning saw. I can’t stress enough how important it is to sterilize your tools with rubbing alcohol before you start—this prevents spreading disease between cuts.
Wear gloves (heavy-duty ones to protect against thorns) and safety glasses, especially if the branches are brittle. Red maples can be messy pruners—those branches snap unpredictably when dry. Work from the ground up, always cutting just outside a bud or branch collar to encourage proper healing. Mark your cuts with a piece of tape if you’re unsure where to trim—it’s better to double-check than to make a bad cut.
🌿 Step 3: Remove Dead, Diseased, or Weak Wood First
Scan the tree for dead branches (they’ll be gray, brittle, and snap easily) and diseased wood (look for mushrooms, sawdust-like frass, or oozing sap). Cut these out first—they’re priority removals. Use your pruners to make a clean, angled cut just outside the branch collar (the swollen area where the branch meets the trunk). This ensures the tree can seal the wound properly.
Next, target crossing branches or those growing inward—they’ll rub against each other and create wounds. Remove up to 25% of the tree’s canopy in one session to avoid overstressing it. If you’re unsure whether a branch is dead, scratch the bark with your thumbnail. If it’s green underneath, it’s still alive; if it’s brown, it’s time to cut.
🌱 Step 4: Thin and Shape for Airflow and Light
Now focus on thinning the canopy to let light and air circulate. Remove suckers (shoots growing from the base or trunk) and water sprouts (fast-growing vertical shoots). These compete with the main structure for energy. Aim to open up the center of the tree by 20-30%—this reduces humidity inside the canopy, which helps prevent fungal issues like anthracnose, a common red maple problem.
For shaping, prioritize outward-facing branches—they’ll create a more balanced silhouette. Avoid topping (cutting the main stem flat), as this encourages weak, bushy growth. Instead, make cuts just above a bud or side branch that’s growing in the direction you want the tree to fill out. Step back every few cuts to visualize the tree’s new shape—you’ll spot areas that need more thinning or pruning.
💧 Step 5: Clean Up and Apply Wound Dressing (If Needed)
After pruning, remove all debris from the ground—burn or bag it to prevent fungal spores from reinfecting the tree. Wipe down your tools again with alcohol to keep them ready for next time. For larger cuts (over ½-inch thick), consider applying a wound dressing (like Tanglefoot Tree Wound Pruning Sealer) to protect the fresh cut from pests and disease. However, skip dressing for small cuts—research shows they heal faster without it.
Water the tree deeply after pruning to help it recover. Mulch around the base (but keep it 3-4 inches away from the trunk) to retain moisture and regulate soil temperature. Avoid heavy pruning in the following year—let the tree recover by focusing on light maintenance pruning (removing only dead or crossing branches) until next spring.
Tips & tricks for pruning red maple trees in early spring
Here's what I've learned from years of shaping these beautiful trees—tricks that'll make your pruning session both effective and stress-free.
Timing is Everything: The 3-4 week window before buds swell is your sweet spot, but don't stress about exact dates. Instead, focus on the buds themselves—when they're tight and plump, that's your cue. I've missed this window before, and the tree struggled to heal properly. If you're in a warmer climate, you might need to prune as early as late February, while colder regions can wait until early March. Always check the forecast for a dry, calm day above 40°F to prevent shock.
Tool Prep Makes All the Difference: Sterilizing your tools with rubbing alcohol between cuts is non-negotiable—it prevents spreading disease from one branch to another. I keep a small bottle of alcohol in my tool belt for quick clean-ups. Also, make sure your bypass pruners are sharp enough to cut cleanly through branches up to ½-inch thick. Dull tools crush wood instead of cutting, which creates larger wounds that take longer to heal. Test your tools on a small branch first to make sure they're ready.
The 25% Rule for Canopy Health: Never remove more than 25% of the canopy in one session—this is crucial for tree health. I learned this the hard way by over-pruning a young maple, which led to weak growth for two seasons. When thinning, focus on opening up the center by 20-30% to improve airflow and reduce fungal risks. Step back every few cuts to visualize the tree's new shape—you'll spot areas that need more attention without overdoing it.
Healing Secrets: For cuts over ½-inch thick, I've found that applying Tanglefoot Tree Wound Pruning Sealer helps protect against pests and disease. But here's the kicker—skip it for smaller cuts! Research shows they heal faster without dressing. After pruning, water deeply to help recovery, and keep mulch 3-4 inches away from the trunk to prevent rot. The key is letting the tree's natural healing processes work without interference.
Pro Tips for Red Maple Tree In Early Spring
- Here's what I've learned from years of shaping these beautiful trees—tricks that'll make your pruning session both ef...
- Timing is Everything: The 3-4 week window before buds swell is your sweet spot, but don't stress about exact dates. I...
- Tool Prep Makes All the Difference: Sterilizing your tools with rubbing alcohol between cuts is non-negotiable—it pre...
Frequently asked questions
Got questions about pruning your red maple tree in early spring? You’re not alone! Here are some of the most common concerns—and the answers you need to keep your tree thriving.
When is the exact best time to prune a red maple in early spring?
The ideal window is late winter to early spring, just before buds swell but before active growth begins (typically February to March, depending on your climate). Avoid pruning during freezing temps or when sap is flowing heavily—this can stress the tree.
How much can I safely remove without harming the tree?
For a healthy red maple, limit pruning to no more than 25% of the canopy in a single season. Focus on removing dead, diseased, or crossing branches first. Over-pruning weakens the tree and reduces its ability to photosynthesize.
What should I do if sap starts leaking after pruning?
Leaky sap is normal for red maples—it’s their way of sealing wounds. To minimize mess, prune on a dry day and use sealing pruning paint (like Tanglefoot Tree Wound Pruning Seal) on cuts larger than ½ inch in diameter. Avoid thick coatings, though—airflow helps the tree heal faster!
Can I prune a red maple if it’s already blooming in early spring?
If your tree is already actively blooming, hold off on heavy pruning until after the flowers fade (usually late spring). Removing branches during bloom can reduce next year’s flower production—and those vibrant red blooms are a sight to behold!
Are there alternatives if I can’t prune in early spring?
If early spring pruning isn’t possible, summer pruning (June–August) is the next best option for red maples. Avoid pruning in fall or winter, as cold stress and fungal risks increase. Just skip the heavy cuts—focus on shaping and removing deadwood.
Wrapping up and next steps
Watching your red maple tree bloom in early spring is a rewarding experience, and with the right pruning techniques, you can ensure its health and vitality for years to come. 🌿 By following the steps outlined—timing your cuts, using the proper tools, and prioritizing safety—you’ll set the stage for stronger growth, better airflow, and stunning foliage.
Now that you’re armed with knowledge, grab those pruners and get ready to give your tree the care it deserves!
💡 Next step: Mark your calendar for late February to early March and start observing your tree’s early signs of growth. The sooner you begin, the sooner you’ll see those vibrant red leaves shining bright!