
Tools
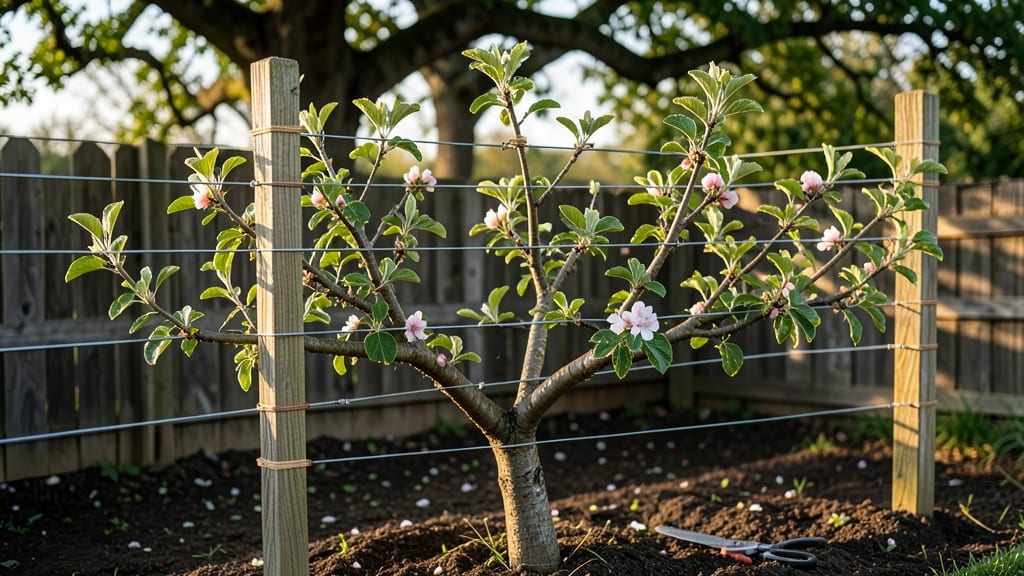
An espalier apple tree trellis turns your tiny backyard into a productive, picture-perfect orchard. 🌿 I built mine against my fence last spring, and now I harvest apples from a tree that fits in a 4-foot-wide space—no ladder needed.
The key is matching the trellis design to your apple variety and growth habits. You’ll need basic materials: 2x4 lumber for the frame, chicken wire or wooden slats for the lattice, and sturdy screws or brackets.
The trellis should lean slightly away from the wall to prevent rot, with horizontal supports every 12-18 inches for the branches to weave through. My favorite design is a modified "fan" shape—simple enough for beginners but elegant enough to become a garden centerpiece.
Once installed, your tree will grow flat against the trellis, making pruning and harvesting effortless. The fruit ripens earlier because the branches get full sun exposure, and you’ll avoid the ladder struggles that come with traditional apple trees. Plus, the ornamental shape adds year-round interest to your garden.
Works for any small space—patios, balconies, or urban yards. The only real mistake? Skipping the proper spacing between branches. Start with a sturdy frame, and your compact orchard will thrive for decades.
📚 In This Guide
- What you need
- Instructions
- Tips and common mistakes
- Wrapping up and next steps
What you need
- ● Apple tree sapling: Dwarf variety (e.g., 'Gala,' 'Fuji,' or 'Honeycrisp') for easier training. Quantity: 1 per trellis.
- ● Trellis framework: Wooden posts: 4x4-inch pressure-treated lumber, 4–6 ft tall (2–3 posts per trellis).
- ● Horizontal supports: 2x4-inch lumber or metal pipes (e.g., PVC or galvanized steel), 6–8 ft long.
- ● Cross braces: 1x2-inch wood or metal rods for stability.
- ● Fasteners: Galvanized screws/nails (2–2.5 inches), 20–30 pieces, and zip ties or soft plant ties (10–15).
- ● Pruning tools: Bypass pruners (sharp and clean!).
- ● Loppers (for thicker branches).
- ● Soil & amendments: Well-draining potting mix or garden soil + compost (5–10 gallons).
- ● Watering supplies: Hose with adjustable nozzle or watering can.
- ● Decorative elements: Paint (non-toxic) for posts, lattice panels, or climbing roses to complement your trellis.
- ● Drip irrigation kit: For hassle-free watering (especially in hot climates).
- ● Tree guard: Wire mesh or plastic spiral wrap to protect young trunks from critters.
- ● Fruit thinners: Organic spray (e.g., hydrogen peroxide) to manage apple yield in later years.
Step-by-step guide to building an espalier apple tree trellis
Turn your small yard into a productive orchard with this simple, elegant trellis system.
🪴 Step 1: Choose and Prepare Your Apple Tree Variety
Select a dwarf or semi-dwarf apple tree variety designed for espalier, such as 'Columnar', 'Gisela', or 'Malling' rootstocks. These compact varieties grow well when trained against a trellis and produce fruit within just a few years. I like to plant mine in early spring when the soil is workable but before buds break—this gives roots time to establish before the growing season begins.
Dig a hole twice as wide as the root ball but only as deep. The top of the root ball should sit 1-2 inches above ground level to prevent waterlogging. Amend the native soil with a handful of compost mixed into the bottom of the hole—this improves drainage and gives roots a nutrient boost right away.
☀️ Step 2: Install the Trellis Framework
Build your trellis using 2x4 lumber for the main posts and horizontal supports. I typically space the posts 6-8 feet apart along a south-facing wall or fence to maximize sunlight exposure. Bury the posts 12-18 inches deep in the ground or anchor them securely to a sturdy wall with heavy-duty brackets.
Attach horizontal branches or wires every 12-18 inches vertically and 12-24 inches horizontally between posts. Use 14-gauge galvanized wire for flexibility—it’s strong enough to support branches but gives enough "give" to train young wood without snapping. Stretch the wire taut between posts, creating a grid pattern that will guide your tree’s growth.
✂️ Step 3: Train the Tree’s Main Structure
Start training your apple tree immediately after planting. Choose 3-4 strong, evenly spaced scaffold branches emerging from the trunk and spread them along the trellis wires at 45-degree angles. Secure each branch with soft plant ties or rubber bands—avoid wire or anything that might cut into the bark as the tree grows.
Remove any competing branches that grow toward the center of the tree or cross over others. You’ll see new shoots form along the scaffold branches—these are your future fruiting spurs. Wait until they’re 4-6 inches long before tying them to the trellis wires, using the same gentle securing method. This encourages a flat, fan-like shape that maximizes sunlight exposure to all parts of the tree.
🌱 Step 4: Prune and Maintain Yearly Growth
Prune your espalier apple tree in late winter or early spring, just before buds swell but before new growth begins. Cut back any branches that grew beyond the trellis wires during the previous season, leaving 2-3 buds on each spur. Thin out crowded branches to improve airflow—this reduces disease risk and helps fruit develop properly.
Watch for water sprouts (fast-growing vertical shoots) and remove them immediately. These sap-suckers drain energy from your tree and don’t contribute to fruit production. After flowering, thin the fruit clusters to 6-8 inches apart—this ensures larger, higher-quality apples. Fertilize lightly in early spring with a balanced fruit tree fertilizer to support new growth.
🍎 Step 5: Harvest and Prepare for Next Season
Harvest your apples when they reach full color and come away from the tree with gentle pressure. I like to check ripeness every 3-5 days during peak season—overripe apples fall quickly and bruise easily. Store them in a cool, dark place with good air circulation for up to 2 months or process them into preserves, cider, or dried fruit.
After harvest, give your tree one final inspection. Remove any dead, diseased, or crossing branches before winter sets in. Apply a thick layer of organic mulch around the base of the tree, keeping it 3-4 inches away from the trunk to prevent rot. This protects roots from freezing temperatures and retains moisture during dry spells. Your espalier apple tree will reward you with years of beautiful growth and delicious fruit!
Tips & tricks for perfect espalier apple tree trellis
These simple tricks will help you create a sturdy, productive trellis that transforms your small space into a thriving orchard.
Tree Selection Wisdom: When choosing your dwarf or semi-dwarf variety, look for trees labeled specifically for espalier. I've found that 'Gisela' rootstocks adapt particularly well to trellis training because of their natural compact growth habit. The key is selecting a tree with multiple strong scaffold branches right at planting—this eliminates the need for years of waiting to establish your framework.
Framework Stability Secret: For the 6-8 foot spacing between posts, I recommend using concrete footings rather than just burying the 2x4s. This prevents posts from shifting over time, which can happen when soil settles. If you're attaching to a wall, use lag bolts with washers to distribute weight evenly—this prevents the brackets from pulling away as the tree grows heavier with fruit.
Training Technique: In Step 3, when you're securing those 45-degree angles, use a simple trick: wrap the branch with a soft plant tie, then gently pull the branch outward while tightening. This creates tension that encourages the branch to grow in that direction. I've seen branches naturally follow the wire's path when trained this way, making future pruning easier.
Pruning Precision: When thinning fruit clusters to 6-8 inches apart, don't just count spaces—use your thumb as a guide. A cluster the width of your thumb at its widest point (about 2 inches) will develop properly sized apples. This visual cue helps maintain consistency across your entire tree, resulting in more uniform fruit.
Pro Tips for Espalier Apple Tree Trellis
- These simple tricks will help you create a sturdy, productive trellis that transforms your small space into a thrivin...
- Tree Selection Wisdom: When choosing your dwarf or semi-dwarf variety, look for trees labeled specifically for espali...
- Framework Stability Secret: For the 6-8 foot spacing between posts, I recommend using concrete footings rather than j...
Frequently asked questions
Got questions about transforming your space with an espalier apple tree trellis? You’re not alone! Here are some of the most common queries—and their answers—to help you grow with confidence.
What’s the best time of year to plant an espalier apple tree?
The ideal window is late fall or early spring when the tree is dormant. This gives roots time to establish before summer heat. Avoid planting in extreme heat or frost—your little orchard artist needs gentle conditions to thrive! For container-grown trees, you can plant year-round (except winter) with proper care.
How long does it take for an espalier apple tree to bear fruit?
Patience is key! With proper pruning and care, espalier apple trees typically bear fruit in 3–5 years. Dwarf varieties may fruit sooner (2–3 years), while standard trees could take longer. Choose disease-resistant varieties like ‘Liberty’ or ‘Gala’ for faster rewards—and don’t forget to cross-pollinate if needed!
Can I use a DIY trellis instead of buying one?
DIY trellises work great with materials like wooden stakes, metal pipes, or PVC frames. Just ensure they’re sturdy enough to support the tree’s weight as it grows. A simple horizontal wire or lattice system (3–4 feet tall) is perfect for beginners. Just add strong ties or clips to secure branches—no fancy tools required!
How do I protect my espalier apple tree from pests?
Prevention is your best friend! Start with healthy soil and proper spacing to reduce stress. Monitor for common pests like aphids or codling moths, and use neem oil or insecticidal soap for organic control. Bird netting can also save your fruit from hungry visitors. Regular pruning (removing diseased branches) keeps your tree in top shape!
Will an espalier apple tree produce as many apples as a standard tree?
Not always—but quality often beats quantity! Espalier trees yield fewer but larger, higher-quality apples due to focused energy. You’ll get easier harvesting, better air circulation (less disease), and stunning decor. For bigger harvests, plant multiple espalier trees or supplement with a dwarf tree nearby. Think of it as art with a side of snacks!
Wrapping up and next steps
Transforming your backyard into a compact, artistic orchard with an espalier apple tree trellis is not just practical—it’s a rewarding project that blends creativity with fruit-bearing success! 🍏✨ By choosing the right materials, planning your design, and nurturing your tree with care, you’ve set the stage for years of lush greenery and delicious harvests.
Whether you’re a seasoned gardener or a beginner eager to try something new, this space-saving technique proves that big results can come in small packages.
Ready to take the next step? Start sketching your trellis design or gather your tools—your future orchard awaits! For extra inspiration, explore espalier patterns or connect with local gardening communities to share your progress. Happy growing! 🌱