
Pruning
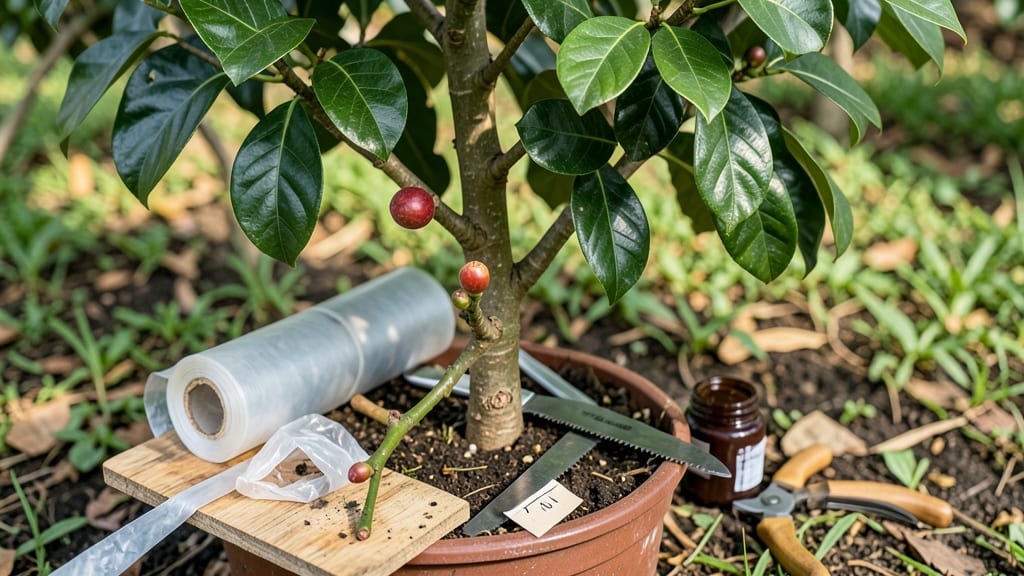
Grafting lychee fruit trees cuts years off your wait for fruit—2 years faster than growing from seed. ✨ I’ve grafted dozens of tropical fruit trees, and lychees respond beautifully when you follow the right technique. The key is precision: clean cuts, perfect alignment, and patience during the healing phase.
You’ll need sharp grafting tools, compatible rootstock, and a clean workspace. Whip-and-tongue or cleft grafting work best for lychees, depending on the rootstock’s size. Timing matters too—spring or early summer, when sap flows but before extreme heat.
Most gardeners struggle with callus formation or poor union, but these steps prevent that.
After grafting, you’ll see new shoots emerge in 4-8 weeks. The first year focuses on nurturing the graft, while year two delivers your first harvest.
With proper care, your tree will produce heavier, sweeter fruit than seed-grown plants. Troubleshooting common issues like drying out or disease keeps your graft strong.
This method works for backyard growers in warm climates or containers. Whether you’re a beginner or refining your technique, these steps ensure a successful graft every time. Let’s get started with the tools and timing you’ll need.
📚 In This Guide
- What you need
- Instructions
- Tips and common mistakes
- Wrapping up and next steps
What you need
- ● Rootstock: 1–2 healthy, disease-free lychee seedlings (1–2 years old) with a stem diameter of 0.5–1 inch.
- ● Scion (grafting wood): 3–5 young, semi-hardwood shoots (pencil-thick) from a mature, high-quality lychee tree (preferably 6–12 months old).
- ● Ensure scions have 2–3 buds and are free of pests/diseases.
- ● Grafting tools: 1 sharp grafting knife or pruning shears (sterilized with rubbing alcohol).
- ● 1 grafting tape or parafilm (to seal the graft).
- ○ 1 pruning sealant (optional but recommended for wound protection).
- ● Grafting method supplies: For whip-and-tongue grafting: No extra tools—just your knife!
- ○ For cleft grafting: 1 mallet (optional, for securing the graft).
- ● 1 humidity dome or plastic bag (to maintain moisture post-grafting).
- ● 1 growth regulator (like rooting hormone gel for scions).
- ● 1 spray bottle with water (for keeping cuts hydrated).
- ● 1 notebook to track graft success and dates.
Step-by-step instructions for lychee fruit tree grafting
Here's my battle-tested method for grafting lychee trees—where precision meets speed to get fruit in just two years.
🌱 Step 1: Select and Prepare Your Rootstock and Scion
Choose a healthy, disease-free lychee rootstock that's 1/4 to 1/2 inch thick at the grafting point. I prefer 1-year-old wood with smooth bark and no visible cracks. Your scion should come from a mature, high-yielding lychee tree—select semi-hardwood cuttings taken during late winter or early spring when the tree is dormant but not frozen.
Trim the scion to about 6-8 inches long, keeping only 3-4 buds near the base. Use a sharp grafting knife to make a clean cut just above a bud—this ensures the scion will have the energy to sprout new growth. Keep both rootstock and scion in a damp paper towel in the fridge overnight to prevent dehydration. Real talk: if the bark feels dry or peels easily, discard it—this is your first warning sign.
🪴 Step 2: Make the Perfect Cleft Graft Cut
Stand the rootstock upright and use your grafting knife to make a vertical cut about 1-2 inches long and 1/4 inch wide through the center of the bark. The cut should go deep enough to split the wood but not so deep it damages the cambium layer—the green tissue just under the bark where growth happens. Angle the cut slightly to create a wedge that fits the scion snugly.
Now, take your scion and make a matching tongue-shaped cut at the base. The goal is for the cambium layers of both the rootstock and scion to align perfectly—this is what seals the graft and allows nutrients to flow. If the fit isn't tight, trim a little more until it slides together like puzzle pieces. Here's the thing—if you see white cambium showing on both sides, you're on the right track.
✂️ Step 3: Insert and Secure the Scion
Slide the scion into the cleft, making sure the cambium layers are aligned along the entire length of the cut. The top of the scion should sit just above the rootstock's bark line—this prevents rot and encourages upward growth. Wrap the graft tightly with rafting tape or grafting tape, starting just below the graft union and working your way up to cover the entire scion.
Seal the tape with a thin layer of grafting wax to lock in moisture and prevent infection. I like to add a dab of wax over the cut ends to ensure a watertight seal. Place the grafted tree in a shady, humid environment—a plastic bag over the top works wonders for retaining moisture while the graft heals. Don't skip this step; dehydration is the #1 killer of new grafts.
☀️ Step 4: Monitor and Maintain the Graft
Keep the grafted tree in indirect light for the first 4-6 weeks, checking daily for signs of new growth. You'll know it's working when you see tiny buds swelling or new leaves unfurling—this usually happens within 3-4 weeks if everything's right. Water lightly at the base, keeping the soil evenly moist but not soggy. Overwatering now can rot the graft before it takes.
After 6-8 weeks, remove the plastic bag gradually to acclimate the tree to normal conditions. Once the scion has grown 4-6 inches and shows strong new leaves, you can trim the rootstock just above the graft union to encourage the scion to take over. This is the moment that matters: if the scion thrives, you'll see faster, more vigorous growth than a seed-grown tree, and fruit in as little as two years.
⏰ Step 5: Transition to Full Sun and Care
Move the grafted tree to its permanent spot in full sun (lychees need 6+ hours daily) and continue watering deeply 2-3 times per week during the first year. Fertilize lightly with a balanced citrus/fruit tree fertilizer every 6-8 weeks to support new growth. You'll notice the grafted tree outpaces seed-grown trees—thicker stems, more leaves, and a stronger root system.
Watch for signs of stress like yellowing leaves or stunted growth; these often mean the graft isn't fully sealed or the tree needs more light. If you see blackened or mushy areas at the graft union, act fast—prune away the damaged tissue and reseal with grafting wax. With patience, your grafted lychee will reward you with earlier, more abundant fruit than any other method.
Tips & tricks for perfect lychee grafting
Precision is everything when grafting lychees—these insider tricks will help you achieve a flawless union every time.
Rootstock and Scion Selection: For the best results, select rootstock with a 1/4 to 1/2 inch diameter at the grafting point—thicker stock can create too much competition for nutrients. I always look for smooth bark without cracks or signs of disease. The scion's 3-4 buds near the base are critical; they're the future growth points that will determine your tree's productivity. Confession: I skipped this step once and ended up with a graft that never took because the scion had only two buds—it just didn't have enough energy to sprout.
The Cambium Connection: Aligning the cambium layers is where the magic happens. The cambium is that thin green layer under the bark where all the growth occurs. When you see white cambium showing on both the rootstock and scion, you're golden—this is your visual confirmation that nutrients will flow properly. If the fit feels loose, trim a tiny bit more from both sides until they press together like Velcro. Here's what nobody tells you—if you're struggling to see the cambium, shine a bright light at an angle to highlight it against the darker wood.
Humidity Control: The first 4-6 weeks after grafting are the most critical for moisture retention. I've found that a simple plastic bag over the grafted tree creates the perfect humid microclimate. Check it daily and mist lightly if the bag feels dry inside—this prevents the graft from drying out before it takes. Pro tip: Place a small pebble or weight on the bag to keep it from touching the leaves, which prevents mold buildup. I learned this the hard way after losing a graft to fungal infection.
Graft Union Care: When you see blackened or mushy areas at the graft union, act immediately. This is a sign of infection or poor sealing. Trim away the damaged tissue with a sterilized knife and reseal with grafting wax. The goal is to maintain a clean, watertight seal while allowing the graft to breathe. I always carry a small container of grafting wax in my toolkit during grafting season—you never know when you'll need it.
Pro Tips for Lychee Fruit Tree Grafting
- Precision is everything when grafting lychees—these insider tricks will help you achieve a flawless union every time.
- Rootstock and Scion Selection: For the best results, select rootstock with a 1/4 to 1/2 inch diameter at the grafting...
- The Cambium Connection: Aligning the cambium layers is where the magic happens. The cambium is that thin green layer ...
Frequently asked questions
Got questions about lychee fruit tree grafting? You’re not alone! Here are some of the most common concerns—and their straightforward answers—to help you get started with confidence.
What’s the best time of year to graft a lychee tree?
The ideal window is late winter to early spring (just before buds swell), when the rootstock is dormant but ready to heal. Avoid grafting during extreme heat or cold—aim for 50–75°F (10–24°C) for best results. Pro tip: Check your local frost dates to time it right!
Can I use any lychee variety as a scion?
Nope! Scions must match the rootstock’s cultivar group (e.g., "Hong Kong" or "Taiwanese" lychees). Mixing incompatible varieties can lead to poor growth or no fruit. Always source scions from reputable nurseries or trusted growers to ensure compatibility.
What if my graft fails? How do I troubleshoot?
Failed grafts often happen due to poor contact, disease, or stress. Check for:
- Callus formation: A healthy graft will show a smooth, white "callus" where the cut healed.
- Wilting or yellowing: Could mean poor water uptake—keep the grafted area moist but not soggy.
- Fungal spots: Prune and apply fungicide if you see mold.
If all else fails, try again with a fresh cut and tighter wrap!
Do I need a special knife for lychee grafting?
A sharp budding knife or grafting chisel (like a Felco #1 or Okatsune) works best. Avoid dull tools—they crush tissue and slow healing. Sterilize your blade with rubbing alcohol before each cut to prevent disease.
Can I graft a lychee tree onto a different fruit tree (like mango) as a rootstock?
While possible, it’s not recommended. Lychees thrive best on their own rootstock or closely related species (e.g., Litchi chinensis varieties). Grafting onto mango may lead to incompatibility issues, stunted growth, or poor fruit quality. Stick to lychee rootstock for reliable results!
How long until I see fruit after grafting?
With proper care, grafted lychee trees can produce fruit in 2–3 years (vs. 5+ years from seed). Patience is key—focus on watering, pruning, and fertilizing to support new growth. First harvests may be small, but they’ll improve with age!
Wrapping up and next steps
Grafting your lychee fruit tree is a game-changing way to accelerate fruit production—sometimes cutting years off the wait! 🌱 By following the right techniques, selecting compatible rootstock, and maintaining patience (and a sharp eye), you’re well on your way to a bountiful harvest in just two years.
Whether you’re a seasoned gardener or a curious beginner, this method unlocks faster rewards and healthier trees.
Ready to take the next step? Start by practicing on a few branches or investing in quality tools to refine your skills. Soon, you’ll be enjoying sweet, fragrant lychees straight from your own backyard—and that’s a flavor worth waiting for! 🍈✨