
How To
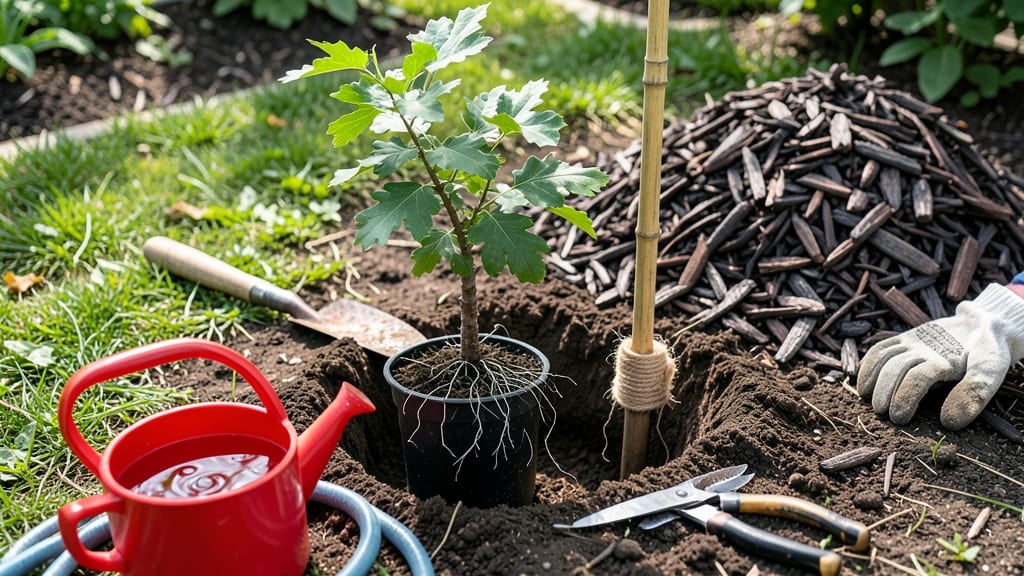
Transplanting tree shoots feels like giving them a second chance at life—especially when roots are circling their pots like tangled vines. 🌱 I’ve rescued dozens of struggling saplings by following a few key steps that make all the difference between a thriving transplant and a sad, wilted stump.
Start by digging a hole twice as wide as the root ball but no deeper—tree roots need room to breathe, not a suffocating pit. Water the shoot the day before transplanting so roots slide out easily, then prune any circling or damaged roots with clean shears.
The goal is to minimize stress while giving roots space to grow outward instead of inward.
📚 In This Guide
- What you need
- Instructions
- Tips and common mistakes
- Wrapping up and next steps
What you need
- ● Tree shoots: Healthy 1-3 year old saplings (1-3 feet tall) with intact root systems. Quantity: 1-5, depending on your project.
- ● Shovel or spade: A sharp, 6-12 inch-wide digging tool for precise holes.
- ● Garden trowel: For delicate root handling and small adjustments.
- ● Pruning shears: Sterilized, sharp shears to trim damaged roots or branches.
- ● Watering can or hose: With a gentle spray nozzle for hydration.
- ● Compost or well-aged manure: 2-3 gallons per tree to enrich soil.
- ○ Mulch (optional but recommended): 2-3 inches of wood chips, straw, or pine needles to retain moisture.
- ○ Rooting hormone (optional): A gel or powder to boost root growth for delicate species.
- ● Staking materials (if needed): 3-4 wooden stakes (1-2 feet tall) or bamboo poles.
- ● Soft garden ties or plastic tree straps to secure stakes without damaging bark.
- ● Gloves: Heavy-duty work gloves to protect hands from thorns and rough bark.
- ● Measuring tape or ruler: To ensure proper spacing (3-5 feet apart for most tree shoots).
- ● Soil test kit: To check pH and nutrient levels before planting.
- ● Mysore or coconut coir: For moisture retention in sandy soils.
- ● Epsom salt: A spoonful mixed into planting holes for magnesium-rich trees (e.g., citrus, fruit trees).
- ● Tree guard or protective collar: To shield young trunks from pests or lawnmowers.
- ● Anti-transpirant spray: Reduces stress on leaves during transplant shock.
Step-by-Step instructions for transplanting tree shoots
Here's the straightforward method I've used to rescue root-bound tree shoots and get them thriving in their new homes.
🪴 Step 1: Prepare the New Planting Hole
Dig a hole that's twice as wide as the root ball but only as deep as the container's base. This prevents burying the trunk too deep, which can cause rot. Loosen the sides of the hole with your shovel so roots can spread easily into the surrounding soil.
I like to add a handful of compost or aged manure to the bottom of the hole—this gives the roots a nutrient boost right where they need it most. Mix it into the native soil so it's evenly distributed. If your soil is heavy clay, work in some sand or perlite to improve drainage.
🌱 Step 2: Gently Remove the Tree Shoot from Its Container
Water the shoot thoroughly the day before transplanting so the roots slide out easily. Turn the container on its side and tap gently until the root ball loosens. If it's stuck, run a knife around the edges to separate it from the pot.
Check the roots carefully—if they're circling tightly around the root ball, use your fingers to gently tease them apart. This prevents the roots from strangling themselves in the new hole. Here's the thing—don't force it if the roots are really tangled. Just make a few cuts to break up the worst of the circling.
💧 Step 3: Position and Plant the Tree Shoot
Place the root ball into the hole so the top of the root ball sits 1 inch above ground level. This prevents settling from burying the trunk too deep later. Fill the hole with soil, tamping it down lightly as you go to remove air pockets without compacting the roots.
Water deeply right after planting to settle the soil and eliminate air gaps. You'll know it's enough when water runs out the bottom of the hole. If the soil settles and the trunk is too deep after watering, add more soil to bring it back to the right level.
☀️ Step 4: Provide Support and Aftercare
Stake the tree shoot if it's tall or top-heavy. Use a soft tree tie to secure it loosely to the stake—tight ties can damage the trunk as it grows. Water every 2-3 days until new growth appears, then taper to weekly watering once established.
Keep the area around the base mulched with 2-3 inches of organic mulch to retain moisture and regulate soil temperature. Watch for wilting or yellowing leaves in the first few weeks—that's normal as the tree adjusts. If leaves stay wilted after watering, the roots might need more time to establish.
✂️ Step 5: Prune and Monitor Growth
Trim any broken or damaged branches right after transplanting to reduce stress. Avoid heavy pruning—just remove what's necessary. In the first growing season, focus on root establishment rather than top growth. You'll see new leaves emerge within 4-6 weeks if everything's going well.
Real talk: The first year is critical. Keep an eye out for pests or signs of stress like leaf drop. If you notice any issues, address them immediately. With proper care, your transplanted tree shoot will grow stronger than ever in its new home.
Tips & tricks for transplanting tree shoots
Between us, these little details make all the difference between a transplant that thrives and one that struggles. I've made every mistake in the book—here's how to avoid them.
Soil Prep Secret: When you're adding that handful of compost or aged manure to the hole, mix it thoroughly with the native soil—don't just dump it in. The goal is to create a nutrient-rich transition zone around the roots, not create a separate layer that could cause root burn. For clay-heavy soils, work in sand or perlite right into the sides of the hole, not just the bottom, so drainage improves all around the root ball.
Root Ball Rescue: If you're dealing with seriously tangled roots in Step 2, don't panic about cutting them all. Just focus on breaking up the worst of the circling—those roots that have completely wrapped around the root ball. A few strategic cuts with clean shears will do more good than trying to untangle everything by hand. Think of it like giving your roots room to breathe after being too cozy in their container.
Positioning Precision: That 1-inch above ground level in Step 3 is non-negotiable. After you've filled the hole and watered, check again—settling can happen even after you think you're done. If the trunk ends up buried too deep, the tree will struggle to breathe and may develop rot. A good trick is to mark the original soil line on the root ball with a pencil before planting, so you have a reference point.
Watering Wisdom: The deep watering after planting isn't just about settling the soil—it's about washing away any air pockets around the roots. You'll know you've done enough when water runs out the bottom of the hole, but don't stop there. Give it another drink in 2-3 days to keep the roots happy during their critical establishment period. Overwatering here is better than underwatering in the first few weeks.
Pro Tips for Transplant Tree Shoots
- Between us, these little details make all the difference between a transplant that thrives and one that struggles. I'...
- Soil Prep Secret: When you're adding that handful of compost or aged manure to the hole, mix it thoroughly with the n...
- Root Ball Rescue: If you're dealing with seriously tangled roots in Step 2, don't panic about cutting them all. Just ...
Frequently asked questions
Got questions about transplanting tree shoots? You’re not alone! Here are answers to the most common concerns to help you tackle your project with confidence.
When is the best time of year to transplant tree shoots?
The ideal time depends on your climate. In temperate zones, early spring (before new growth) or fall (after leaves drop) works best. Avoid extreme heat or frost—roots need time to establish without stress. For tropical areas, transplant during the wet season for moisture support.
How long does it take for transplanted tree shoots to root?
Most tree shoots take 4–8 weeks to establish roots, but this varies by species. Smaller, younger shoots recover faster. Monitor soil moisture (keep it consistently damp but not soggy) and avoid fertilizing until new growth appears—roots need energy, not nutrients, at first!
Can I transplant tree shoots without digging up the whole root ball?
Yes! For delicate or small shoots, try the "slip-and-save" method: Gently loosen the soil around the edges with a spade, then slide the shoot out horizontally while keeping roots intact. This reduces shock, especially for root-bound or container-grown plants. Just be quick—exposed roots dry out fast!
What if my transplanted shoots turn yellow or wilt?
Yellowing leaves often signal transplant shock or overwatering. Check the soil—it should feel like a wrung-out sponge. If wilting persists, trim any mushy roots (sign of rot) and repot in fresh, well-draining soil. Shade and humidity (like a plastic bag over the pot) can speed recovery for a few days.
Are there any tree species that transplant better than others?
Some trees thrive after transplanting more easily than others. Fast growers like willows, poplars, or fruit trees (e.g., apple or pear) adapt well, while slow-growing or deep-rooted species (e.g., oaks or maples) struggle. Bald cypress or river birch are also transplant-friendly—research your species’ root depth and hardiness zone!
Still unsure? Drop your specific tree type or concerns in the comments—we’re happy to help troubleshoot!
Wrapping up and next steps
Transplanting tree shoots might seem intimidating, but with the right tools, patience, and care, you can give your young plants a thriving new home! 🌱 Remember, the key is gentle handling, proper soil prep, and consistent aftercare—your efforts will pay off in lush, healthy growth.
Now that you’re armed with the know-how, why not grab those clippers and get started?
For extra confidence, watch a few video tutorials or join a local gardening group to swap tips. Happy planting—your future shade tree (or fruit!) is waiting! 🌳✨