
Pruning
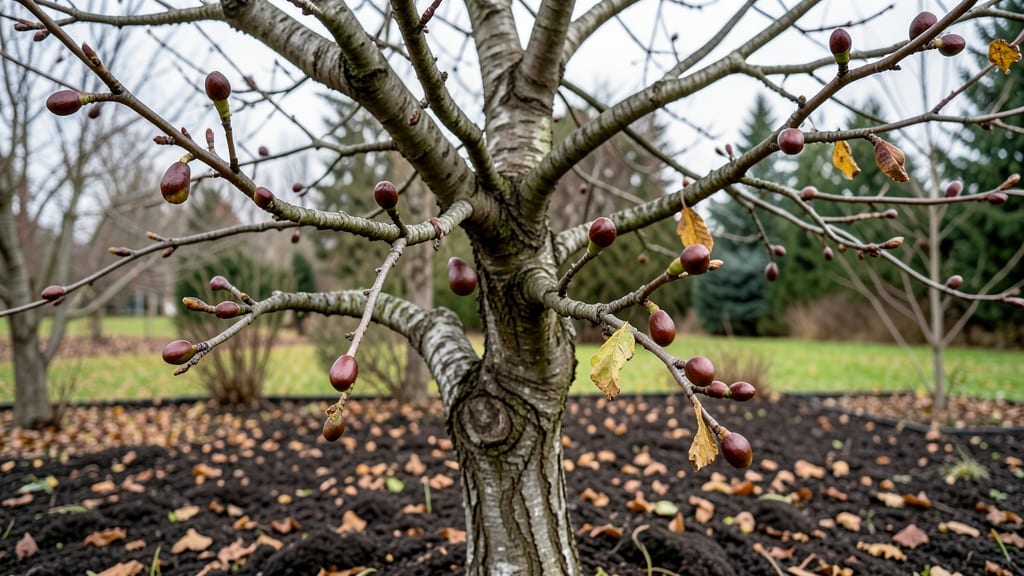
Your pear tree’s buds hold the secret to next year’s harvest—and pruning them right now determines whether those buds will grow into healthy fruit or weak, sparse branches. 🌱 I’ve spent years watching buds transform from tiny nubs into blossoms, and the difference between a productive tree and a struggling one comes down to timing, technique, and a few key pruning rules most gardeners miss.
Healthy buds form in late summer and early fall, but the real work happens in dormant season (late winter to early spring). You’ll want to look for plump, brown buds clustered along the branches—these are your future fruit.
Thin out crowded buds to improve airflow, and cut back any dead or diseased wood first. The goal is to encourage stronger, more abundant buds that lead to bigger harvests.
By pruning strategically, you’ll see buds develop faster and fruit production double within 2-3 seasons. The branches will support more weight, and your tree will resist pests and frost damage better.
Think of it as a reset button for your pear tree—what feels like a chore now becomes the foundation for years of bountiful harvests.
This method works for both young trees (establishing structure) and mature trees (revitalizing growth). The key is patience: buds take time to mature, but the payoff is worth it. Let’s get those branches ready for next year’s fruit.
📚 In This Guide
- What you need
- Instructions
- Tips and common mistakes
- Wrapping up and next steps
What you need
- ● Pruning shears: Bypass pruners (for cuts up to ½ inch thick) – 1 pair
- ● Loppers: For branches ½ to 2 inches thick – 1 pair
- ● Pruning saw: For thicker branches (2+ inches) – 1
- ● Gloves: Heavy-duty gardening gloves (cut-resistant) – 1 pair
- ● Disinfectant: 70% isopropyl alcohol or bleach solution (1 part bleach to 9 parts water) – small bottle or spray
- ● Rubbing alcohol or hand sanitizer: For cleaning tools between cuts – small bottle
- ● Tarp or drop cloth: To collect debris – 1-2 large sheets
- ● Ladder: Sturdy, extendable ladder (if tree is tall) – 1
- ○ Pruning sealant: Optional, for larger cuts (½ inch or wider) – small tube
- ● Notebook & pen: To jot down notes on cuts or tree health – 1
- ● Safety glasses: Protects eyes from debris – 1 pair
- ● Long sleeves & pants: For added protection against thorns or branches – 1 set
- ● Tree wrap or tape: To protect young bark from sun scorch – roll or strips
- ● Marking spray: Temporary spray to mark branches for removal – small can
- ● Compost bin or bag: For collecting pruned branches – 1-2
How to prune pear tree buds for optimal fruit production
Pruning pear tree buds isn't just about shaping—it's about directing energy where it matters most.
🌿 Step 1: Identify Healthy Buds and Dormant Growth
Start by examining your pear tree during late winter or early spring, just as buds begin to swell but before active growth. Look for plump, firm buds with a slight greenish tint—these are your fruit-bearing buds. Avoid pruning woody, shriveled buds or those with blackened edges, as these indicate disease or winter damage.
Use your fingers to gently press the bark just above each bud. Healthy buds should have a smooth, unbroken surface with no cracks or oozing sap. If you find buds clustered too closely, you'll need to thin them out later—this prevents overcrowding and improves air circulation.
✂️ Step 2: Remove Dead, Diseased, or Weak Wood
Begin pruning by cutting out any branches that are dead, diseased, or crossing at sharp angles. Use sharp pruning shears to make clean cuts at a 45-degree angle, about ¼ inch above an outward-facing bud. This ensures water runs off the cut and the new growth directs itself away from the center of the tree.
Watch for branches with multiple buds clustered tightly—these often produce weak, spindly growth. Cut these back to leave only the strongest, most vigorous bud on each branch. I always prune on a dry day; wet conditions spread fungal spores, and pear trees are particularly susceptible to silver leaf fungus.
☀️ Step 3: Thin Out Buds for Better Fruit Development
Now focus on the fruit buds themselves. Pear trees often set too many buds, leading to small, poor-quality fruit. Using your fingers or a small pruning tool, gently remove every other bud along each branch, leaving only the largest, healthiest buds. Prioritize buds on the outside of the tree to encourage an open canopy that lets sunlight penetrate.
Here's the thing—pear buds are sensitive to over-thinning. If you remove more than 30% of buds in one season, the tree may struggle to produce enough fruit the following year. I like to thin gradually over two years if the initial bud load is heavy, spreading the stress on the tree.
🪴 Step 4: Shape for Airflow and Light Penetration
Step back and assess the tree's overall shape. Pear trees benefit from an open-center form, where branches spread outward rather than crowding the center. Prune to create a central leader (main vertical stem) with 4-6 scaffold branches radiating outward at 45-degree angles.
Look for branches growing inward or rubbing against others—these need removal to prevent damage. I always prune these first, as they compete for light and nutrients. Leave 2-3 inches of stub below each cut to prevent water from pooling and rotting the wound.
⏰ Step 5: Time Your Final Pruning for Early Spring
Finish all pruning 4-6 weeks before your last frost date, when buds are still dormant but beginning to swell. This timing allows the tree to heal before active growth begins. Avoid heavy pruning in late spring or summer, as new growth won't harden off properly before winter.
After pruning, apply a wound dressing (like tree sealant) only to cuts larger than ½ inch in diameter. Small cuts on pear trees actually heal better when left exposed to air. Water the base of the tree deeply to help it recover from the stress of pruning.
Tips & tricks for pruning pear tree buds
Mastering pear tree pruning takes practice, but these insights will help you avoid common mistakes and maximize your tree's potential.
Bud Health Inspection: In Step 1, when examining buds, focus on the bud scale texture—healthy buds have smooth, slightly glossy scales that press together firmly. If scales separate easily or appear dry and papery, that bud is already compromised. I've learned the hard way that pruning diseased buds too late can spread pathogens throughout the tree, so always remove any with blackened or cracked scales immediately. This inspection should take about 10-15 minutes per branch—don't rush it.
The 45-Degree Angle Secret: The 45-degree cut angle in Step 2 isn't just about aesthetics—it's about water runoff. When you make clean cuts at this angle above an outward-facing bud, rainwater flows away from the wound instead of pooling. I've seen many gardeners make flat cuts that create perfect little water traps, leading to rot. For stubborn branches, use a pruning saw for larger cuts over ½ inch thick, then finish with shears for precision.
Bud Thinning Strategy: During Step 3, when thinning buds, prioritize sun-exposed buds on the outer canopy first. These will develop into the largest, most flavorful fruit. I've found that leaving one dominant bud every 6-8 inches along a branch creates optimal spacing. For young trees, you can be more aggressive with thinning—up to 40% reduction—while mature trees should stay closer to the 30% maximum mentioned in the instructions to avoid stress.
Timing is Everything: The 4-6 week window before your last frost date in Step 5 is critical because pear trees need time to heal before active growth begins. I've pruned too late in spring and ended up with weak, susceptible new growth that struggled through summer. Check your local frost dates and mark your calendar—this timing ensures your tree enters dormancy with clean wounds that can properly seal before winter. For northern climates, aim for early April pruning, while southern regions can wait until late February.
Pro Tips for Pear Tree Buds
- Mastering pear tree pruning takes practice, but these insights will help you avoid common mistakes and maximize your ...
- Bud Health Inspection: In Step 1, when examining buds, focus on the bud scale texture—healthy buds have smooth, sligh...
- The 45-Degree Angle Secret: The 45-degree cut angle in Step 2 isn't just about aesthetics—it's about water runoff. Wh...
Frequently asked questions
Got questions about pear tree buds and pruning? You’re not alone! Here are some of the most common concerns—and answers—to help you grow a thriving pear tree.
When is the best time to prune pear tree buds for optimal fruit production?
The ideal time to prune pear tree buds is late winter or early spring, just before buds swell but before new growth starts. This timing promotes vigorous growth and fruit development. Avoid pruning in fall, as it can expose the tree to disease or cold damage.
What if my pear tree buds are dying or not opening in spring?
Dying buds could signal bacterial blight, frost damage, or poor circulation. First, inspect for signs of disease (oozing sap, blackened buds). If frost is the culprit, wait until temperatures stabilize. Prune out dead buds and improve airflow by thinning dense branches. For persistent issues, consult a local arborist.
How much should I trim off pear tree buds—is there a rule of thumb?
Aim to remove no more than 20-25% of the tree’s canopy in a single pruning session. Focus on:
- Dead, diseased, or crossing branches
- Water sprouts (fast-growing vertical shoots)
- Bud clusters with poor fruit potential
Can I prune pear tree buds to control fruit size or increase yield?
Yes! Thinning buds (especially in late winter) can reduce overcrowding and improve fruit size/quality. Leave 3–5 buds per spur cluster (short fruiting branches) to balance yield. Avoid over-thinning—pear trees need some buds to sustain energy for next year’s harvest.
Are there alternatives to traditional pruning for pear tree buds?
If pruning feels overwhelming, try selective bud thinning in early spring: Gently remove excess buds by hand (wear gloves!). For young trees, focus on shaping the structure first. Another option: heading cuts (shortening branches) to encourage bushier growth—but avoid heavy cuts that stress the tree.
Wrapping up and next steps
Pruning your pear tree buds isn’t just about shaping—it’s about inviting healthier growth, better fruit yields, and a stronger tree. By mastering the timing, techniques, and tools, you’re setting your tree up for long-term success.
Whether you’re a seasoned gardener or just starting, every careful cut brings your pear tree one step closer to flourishing.
Ready to take action? Grab your pruners, mark your calendar, and start small—even a few strategic cuts this season can make a world of difference. Your pear tree (and future harvests) will thank you! 🌱✂️