
Container Gardens
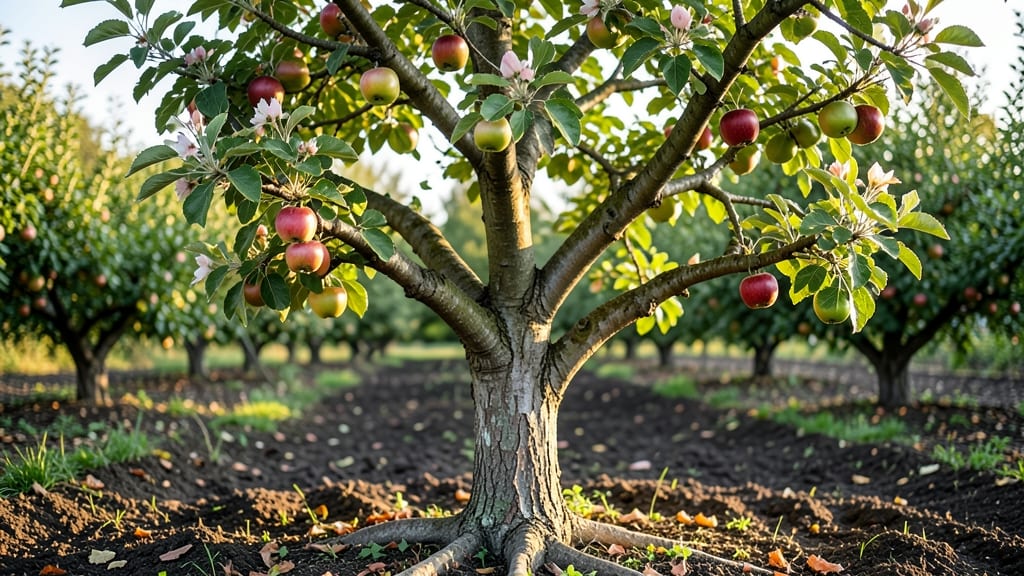
Growing an apple tree from seed captures the magic of a time lapse—one where 7-10 years of patience bloom into a harvest of sweet rewards. 🌱 I planted my first seedling in a plastic cup last March, and by autumn, it had grown into a sturdy sapling—proof that patience pays off in lush green growth and future harvests.
The first year focuses on establishing roots and sturdy stems. You'll see tiny leaves unfurl within weeks, then rapid vertical growth by summer. By year two, you'll spot the first buds that hint at future blossoms, though fruiting won't happen until years later.
Each spring brings new leaves, each summer adds height, and each autumn reveals the tree's true potential.
By year five, you'll notice clusters of white blossoms in spring, followed by tiny green apples by summer. Those first fruits might be small or misshapen, but they're a sign your tree is maturing.
With proper care—full sun, regular watering, and annual pruning—you'll eventually harvest full-sized apples that taste sweeter than anything store-bought.
This journey works for any climate zone with proper winter protection. The real reward? Watching your tree grow from a fragile seedling to a productive orchard centerpiece, one season at a time.
📚 In This Guide
- What you need
- Instructions
- Tips and common mistakes
- Wrapping up and next steps
What you need
- ● Apple seeds: 3–5 fresh, organic seeds (from a non-hybrid apple variety for best results). Pro tip: 💡 Save seeds from heirloom apples or ask a local orchard for fresh specimens!
- ● Potting soil: 1–2 bags (10–20 lbs each) of high-quality, well-draining potting mix (avoid garden soil—it compacts too easily!).
- ● Container or planting area: For containers: A 5–10 gallon pot (with drainage holes) for seedlings; upgrade to a 15+ gallon pot or ground planting as the tree grows.
- ● For ground planting: A sunny spot with at least 6–8 hours of sunlight daily and loose, fertile soil (pH 6.0–7.0).
- ○ Growing medium additives (optional but helpful): 1 cup perlite or vermiculite (for aeration)
- ● 1 cup compost or worm castings (for nutrients)
- ● Planting tools: Small trowel or spoon (for seed planting)
- ● Watering can or spray bottle (for gentle hydration)
- ○ Growth aids (optional): Biodegradable plant tags (to track seed varieties)
- ● Mini greenhouse or humidity dome (to retain moisture for seedlings)
- ● Sturdy stakes or trellis (for young trees in windy areas)
- ● Pruning tools (for later stages): Sharp pruning shears (for shaping the tree)
- ● Garden gloves (to protect your hands)
- ● Patience: Apple trees from seed take 5–10 years to bear fruit—plan ahead! ✨
- ● Climate check: Ensure your zone is USDA Hardiness Zone 4–9 (most apple varieties thrive here).
- ● Pollination plan: If growing from seed, your tree may not produce true-to-type fruit. For guaranteed apples, consider grafting later or planting a second variety nearby.
Step-by-step guide to tracking your apple tree’s seasonal growth
Here's how to document your apple tree's transformation from seed to fruit—season by season.
🌱 Step 1: Start with Seed Germination (Spring)
Plant apple seeds in a 6-inch pot filled with moist seed-starting mix at a depth of ½ inch. Place the pot in a warm spot (70-75°F) and cover with plastic wrap to retain humidity. Germination takes 3-6 weeks, so be patient—you'll know it's working when the first green shoot cracks through the soil.
Once sprouts appear, remove the plastic and move the pot to a sunny window or under a grow light for 12-14 hours daily. The seedling’s first true leaves (not the initial cotyledons) will emerge in 2-3 weeks, signaling it’s ready for its next growth phase. This is your first milestone—take a photo to track progress.
☀️ Step 2: Transplant and Early Growth (Late Spring/Early Summer)
After 4-6 weeks with 3-4 true leaves, transplant the seedling into a 1-gallon pot with well-draining potting mix. Choose a spot with full sun (6+ hours daily) and dig a hole twice as wide as the root ball. Water deeply after planting to settle the soil.
Your tree will enter rapid growth mode—watch for new leaves forming every 2-3 weeks. By mid-summer, it may reach 12-18 inches tall. Prune leggy branches to encourage bushier growth, cutting just above a leaf node. Snap a photo every 4 weeks to capture its upward spurt.
🌿 Step 3: First Year Development (Summer/Fall)
By late summer, your sapling will develop its first buds—tiny swellings along the branches. These are your future flowers! Keep soil moist (1 inch of water weekly) but avoid overwatering, which causes root rot. Mulch with 2 inches of organic matter to retain moisture and protect roots.
In fall, leaves will turn yellow or brown before dropping. This is normal—your tree is entering dormancy. Reduce watering to every 2 weeks and stop fertilizing. Prune dead or crossing branches before winter. Document the seasonal change with a final photo before the first frost.
⏰ Step 4: Winter Dormancy and Spring Revival (Winter/Early Spring)
During winter, your tree rests. Protect young trees from harsh winds with burlap wraps or move pots to a sheltered spot. In early spring, new buds will swell—this is your cue to resume watering (every 1-2 weeks) and fertilizing (balanced 10-10-10) when shoots emerge.
By late spring, you’ll spot white blossoms—the first sign of potential fruit! Hand-pollinate if needed (apples often require cross-pollination). Track blossom count to predict harvest size. Snap photos of flowers and early fruit set to compare with next year’s growth.
🍎 Step 5: Fruit Development and Harvest (Summer/Fall)
Fruit will grow rapidly—1 inch per month—so monitor for pests (aphids, coddling moths) and diseases (apple scab). Thin fruit to 6 inches apart to ensure larger, healthier apples. By late summer, apples will turn color and firm up—this is harvest time!
Harvest when fruit detaches easily from the tree. Celebrate your first crop! Compare your final photos to the seedling stage—you’ve witnessed a full transformation. Save seeds from your best apples to repeat the cycle.
Tips & tricks for perfect apple tree growth tracking
Watching your apple tree grow from seed to fruit is one of the most rewarding gardening experiences—here's how to make every stage even more successful.
Germination Success: The 70-75°F temperature range is crucial for those first few weeks. If your home runs cooler, consider using a heat mat under the pot or placing it near a sunny window with a space heater (keep it safely away from the plastic wrap!). I've seen germination speed up dramatically when the soil stays consistently warm—sometimes even cutting that 3-6 week range down to just 2-3 weeks.
Lighting Strategy: Those 12-14 hours of light daily are non-negotiable for strong seedling development. If natural sunlight isn't enough, supplement with a grow light placed just 6 inches above the seedlings. I learned this the hard way—my first attempt with inadequate light resulted in leggy, weak stems that couldn't support themselves. The key is to keep the light intensity bright enough that you can read a book comfortably underneath it.
Transplanting Preparation: When you're ready to move your 4-6 week old seedling to its 1-gallon pot, water it thoroughly the day before transplanting. This helps prevent transplant shock by keeping the roots hydrated during the move. After transplanting, give it another deep watering to settle the soil around the roots—this is especially important in Step 2 when you're establishing that new root system in its permanent home.
Documentation Tips: For your time-lapse photos, I recommend using a consistent spot and angle for each photo session. This creates a more dramatic visual progression when you compare images from different seasons. Consider marking your photo location with a small stake or using a tripod for perfect alignment. The 4-week photo intervals in summer work well, but you might want to capture weekly shots during the rapid growth months to document every change.
Pro Tips for Apple Tree Growing Time Lapse
- Watching your apple tree grow from seed to fruit is one of the most rewarding gardening experiences—here's how to mak...
- Germination Success: The 70-75°F temperature range is crucial for those first few weeks. If your home runs cooler, co...
- Lighting Strategy: Those 12-14 hours of light daily are non-negotiable for strong seedling development. If natural su...
Frequently asked questions
Got questions about growing an apple tree from seed to fruit? Here are some common ones—plus quick answers to keep your orchard dreams on track!
How long does it take for an apple tree to bear fruit from seed?
Patience is key! Most apple trees grown from seed take 5–10 years to produce fruit, though grafted varieties (like those from nurseries) may fruit in 2–4 years. Seed-grown trees are also less predictable—expect variability in size, shape, and flavor.
What’s the best time of year to plant an apple tree?
Plant in early spring or fall (4–6 weeks before your area’s first frost) for optimal root establishment. Avoid extreme heat or cold. If using bare-root saplings, plant while dormant (late winter/early spring). Container-grown trees can go in year-round, but spring or fall is ideal.
Can I grow an apple tree in a container? Yes—but what size pot do I need?
For dwarf varieties, a 15–25 gallon pot with drainage holes works well. Standard-sized trees need 50+ gallons and deep containers (at least 18–24 inches). Use well-draining soil and repot every 2–3 years to prevent root bind. Rotate pots annually for even growth.
Why aren’t my apple tree leaves turning green? (Or other common issues)
Yellowing leaves? Check for nutrient deficiencies (add compost or fertilizer) or overwatering (let soil dry slightly between waterings). Brown edges? Could be underwatering or pests (spider mites, aphids). If leaves curl or drop early, it might be stress from heat, wind, or disease. Prune damaged areas and monitor regularly.
Will my homegrown apples taste like store-bought ones?
Probably not—and that’s okay! Seed-grown apples often have unique flavors (tart, complex, or even weirdly sweet), but they may not match commercial varieties. For predictable taste, choose grafted trees labeled with familiar names (like Fuji or Gala). Experiment with heirloom seeds for surprises!
Still stumped? Drop your question in the comments—we’re happy to help troubleshoot your apple-growing adventure!
Wrapping up and next steps
Watching an apple tree grow from a tiny seed to a fruitful tree is a rewarding journey filled with patience, care, and tiny victories—like the first leaves or that magical bloom of pink blossoms. 🌱 Whether you're growing in a container or your backyard, each season brings new lessons and the sweet promise of harvest.
Now that you’ve got the timeline and tips, take the next step: plant your seed or sapling today and start documenting your own time-lapse adventure!
💡 Pro Tip:
Use a small notebook or app to track milestones—like bud break, fruit set, or first harvest. Future you (and your tree!) will thank you!