
Size
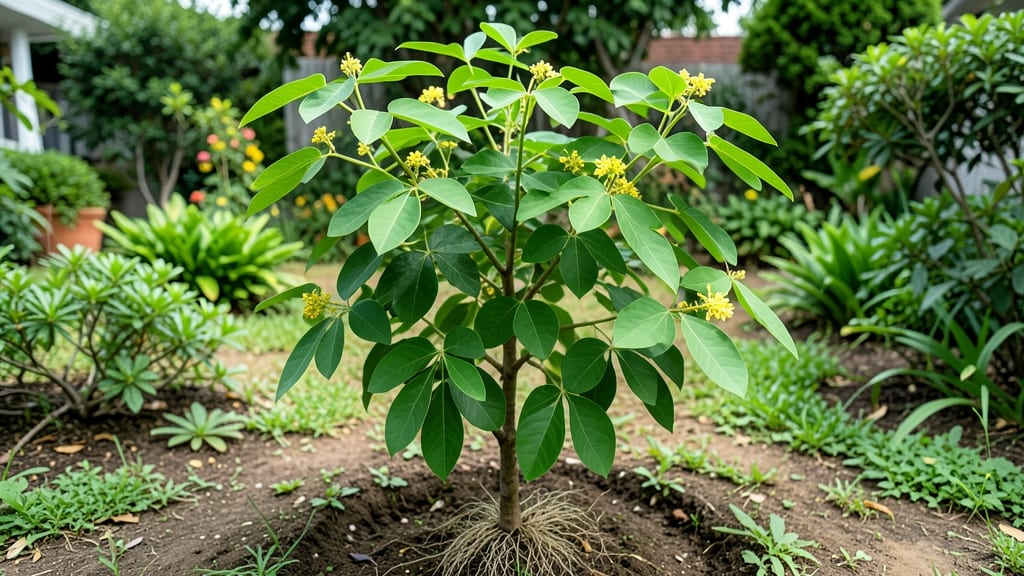
How to grow the moringa tree indoors means fresh superfood leaves year-round—if you nail the light and soil. 🌱 I’ve grown mine from seed to harvestable height in just 3 months, and the secret isn’t fancy equipment but matching its tropical roots to your home’s conditions. Start with a 5-gallon pot, well-draining soil, and a south-facing window (or grow light). Moringa thrives on neglect—water when the top inch is dry, and it’ll reward you with fast growth and nutrient-packed leaves. The first harvestable pods appear around 4-5 months, but the leaves are ready much sooner. What you’ll end up with is a compact, bushy plant that produces more than store-bought moringa powder—plus, the smell of fresh leaves is like a tropical breeze in your kitchen. The key is keeping it happy without overcomplicating things. This works for apartments, kitchens, or sunrooms—just avoid drafts and cold spots. Let’s get those seeds sprouting!
📚 In This Guide
- What you need
- Instructions
- Tips and common mistakes
- Wrapping up and next steps
What you need
- ● Moringa seeds: 3–5 high-quality, organic seeds (ensure they’re fresh for best germination rates).
- ● Growing container: A 6–12 inch drainage pot (terracotta or fabric) with drainage holes. Pro tip: 💡 A 1-gallon pot works perfectly for starters!
- ● Well-draining potting mix: A blend of cactus/succulent soil (60%) + perlite or vermiculite (40%) for aeration. Avoid heavy garden soil!
- ○ Grow lights (optional but recommended): A full-spectrum LED grow light (12–15 watts) for 12–14 hours/day if natural light is limited.
- ● Adjustable light stand (12–18 inches above the plant).
- ● Spray bottle: For gentle watering (avoid over-saturating seeds).
- ● Humidity dome or plastic wrap: To retain moisture during germination (remove after sprouts appear).
- ● Fertilizer (after 4 weeks): Balanced liquid fertilizer (10-10-10 or 20-20-20, diluted to half-strength).
- ● OR organic options like fish emulsion or compost tea.
- ● Pruning shears: Small, sharp scissors for trimming (once the tree reaches 12+ inches).
- ● Soil moisture meter: To monitor water levels without overwatering.
- ● Self-watering planter: Reduces maintenance for busy plant parents!
- ● Support stake or trellis: If you want to guide vertical growth (moringa can grow 6–10 feet tall indoors!).
- ● pH test kit: Ensure soil pH stays between 6.0–7.5 (moringa thrives in slightly acidic to neutral soil).
- ● Compost or worm castings: Boosts nutrient density for faster growth.
Step-by-Step instructions for growing moringa tree indoors
Here's how I grow fast, productive moringa trees indoors—using full-spectrum light and precise care.
🪴 Step 1: Select the Right Container and Soil Mix
Choose a 5-7 gallon pot with drainage holes—moringa roots need room to spread. I use a well-draining cactus/succulent mix blended with 20% perlite to prevent root rot. The soil should feel slightly gritty when dry, not compacted like garden soil. Fill the pot 2/3 full with this mix and moisten lightly before planting.
Moringa hates soggy roots, so if your mix doesn't drain fast enough, add extra perlite or coarse sand. Tap the pot gently after filling to settle the soil without compacting it. The goal is a loose, airy medium that mimics its native dry conditions.
🌱 Step 2: Plant Seeds or Transplant Seedlings Correctly
If starting from seed, plant 2-3 seeds per pot at a depth of 1/4 inch—too deep delays germination. Cover lightly with soil and mist until the surface feels damp. For faster results, use 1-2 inch tall seedlings from a nursery, planting them at the same depth they grew in their original container.
Press the soil gently around the seed or seedling to remove air pockets. Water thoroughly until water runs from the drainage holes, then let it drain completely. Place the pot in a warm spot (75-85°F)—a seedling heat mat speeds germination if your home runs cooler. Expect sprouts in 7-14 days if conditions are ideal.
☀️ Step 3: Provide Full-Spectrum Light for Rapid Growth
Moringa needs 6-8 hours of direct sunlight daily, but indoor light rarely delivers enough intensity. Use a full-spectrum LED grow light positioned 6-12 inches above the plant, adjusted as it grows. Keep it on for 14-16 hours daily to mimic tropical daylight. You'll see leggy growth if the light is too far away—stems will stretch pale and weak.
Rotate the pot quarter-turn weekly so the plant grows straight, not leaning toward the light. Watch for dark green, glossy leaves—this means your light is strong enough. If leaves yellow or stems bend excessively, move the light closer or increase intensity. A south-facing window helps but won't suffice alone.
💧 Step 4: Water and Fertilize for Optimal Health
Water when the top 1-2 inches of soil feel dry—moringa tolerates drought better than overwatering. Stick your finger in the soil; if it's damp below 1 inch, wait another day. When you water, do it deeply until water exits the drainage holes, then empty the saucer to prevent root rot. Overwatering causes yellowing leaves and stunted growth.
Feed every 4-6 weeks with a balanced liquid fertilizer (10-10-10) diluted to half strength. Moringa grows fast, so it needs nutrients, but too much fertilizer burns roots. I also sprinkle 1 teaspoon of compost on the soil surface monthly for slow-release nutrition. Prune leggy stems to encourage bushier growth—cut just above a leaf node to stimulate branching.
✂️ Step 5: Harvest and Prune for Continuous Production
You can harvest leaves when the plant reaches 12-18 inches tall, but I wait until it's 2-3 feet for better yield. Use clean scissors to snip young leaves and tender tips—never take more than 1/3 of the plant at once. Harvesting stimulates new growth, so you'll see fresh shoots within 2-3 weeks. Leaves regrow faster if you prune just above a leaf node rather than cutting stems back hard.
To keep your moringa bushy, pinch back the top 2-3 inches of new growth when the plant hits 3 feet. This encourages lateral branches and a fuller shape. Avoid heavy pruning in winter—moringa grows slower in cooler months and needs time to recover. With proper care, you'll harvest year-round in a sunny indoor space.
Tips & tricks for growing moringa trees indoors
Here's what I've learned after growing moringa for years—these tricks make all the difference between a struggling plant and a thriving superfood factory.
Light Positioning: Place your grow light 6-12 inches above the plant and adjust as it grows, but never let it get closer than 4 inches. I use a timer for the 14-16 hours daily cycle—this consistency mimics tropical daylight perfectly. Watch for leaves growing toward the light; if they do, rotate the pot quarter-turn weekly to keep it straight. The goal is even growth, not leggy stems reaching for more light.
Soil Moisture Test: The finger test in Step 4 is critical—stick your finger 1 inch deep into the soil. If it feels damp, wait another day. I've ruined moringa plants by overwatering, and the first sign is yellowing leaves. The 20% perlite in your mix helps prevent this, but don't rely on it completely. Water only when the top 1-2 inches feel bone dry, and always water deeply until it drains from the bottom.
Germination Boost: If you're planting seeds and they're taking longer than 14 days to sprout, try soaking them in warm water for 4-6 hours before planting. I've found this cuts germination time in half. Keep the soil consistently moist (not soggy) during this period, and maintain that 75-85°F warmth. A seedling heat mat makes all the difference if your home runs cooler—it's worth the small investment for faster results.
Harvesting Strategy: When harvesting in Step 5, always cut just above a leaf node—this is where new growth will sprout. I use clean scissors and make my cuts at a 45-degree angle to prevent tearing. Harvesting young leaves and tender tips gives you the most nutrition, but never take more than 1/3 of the plant at once. You'll notice new growth within 2-3 weeks if you follow this method consistently.
Pro Tips for Grow Moringa Tree Indoors
- Here's what I've learned after growing moringa for years—these tricks make all the difference between a struggling pl...
- Light Positioning: Place your grow light 6-12 inches above the plant and adjust as it grows, but never let it get clo...
- Soil Moisture Test: The finger test in Step 4 is critical—stick your finger 1 inch deep into the soil. If it feels da...
Frequently asked questions
Got questions about growing moringa indoors? You’re not alone!
Here are some of the most common concerns—plus quick, actionable answers to keep your superfood tree thriving.
How fast does a moringa tree grow indoors?
With the right care, your moringa tree can grow surprisingly fast—expect 1-2 feet (30-60 cm) in 3 months if given plenty of light, warmth, and nutrients. Young plants may sprout leaves in as little as 2-4 weeks, but consistent pruning and repotting (every 6-12 months) will encourage bushier, healthier growth. Patience pays off: mature trees can reach 6-10 feet (2-3 meters) tall indoors with proper attention!
Can moringa survive winter indoors?
Moringa is tropical at heart, so it’s sensitive to cold drafts and temps below 50°F (10°C). Keep it in a sunny, warm spot (60-85°F / 15-30°C is ideal) away from AC vents or chilly windows. If your home gets frigid, a grow light and a heated mat can help. Watch for yellowing leaves—a sign it’s too cold. Pro tip: Rotate your plant weekly to ensure even light exposure!
Why are my moringa leaves turning yellow?
Yellow leaves usually mean overwatering, underwatering, or nutrient deficiencies. Check the soil first—it should be damp but not soggy. If the roots smell rotten, repot in fresh, well-draining soil. Brown edges? Too little humidity (aim for 40-60%). Pale or limp leaves? Boost light or fertilize with a balanced liquid fertilizer (diluted to half-strength). Moringa is resilient—adjust care and it’ll bounce back!
Can I grow moringa from seeds or cuttings?
Both work, but seeds are easier for beginners—soak them overnight to speed up germination (usually 7-14 days). For cuttings, take 4-6 inch (10-15 cm) stems, remove lower leaves, and dip in rooting hormone before planting in moist soil. Keep humidity high (use a plastic bag!) and avoid direct sunlight until roots form (2-4 weeks). Pro tip: Seeds may take longer but yield hardier plants.
What if my moringa tree gets too tall for my space?
No problem! Prune regularly to encourage bushier growth and keep it manageable. Use clean scissors to trim just above a leaf node (where new branches form). Bonus: Pruned leaves are edible and packed with nutrients—toss them into smoothies or salads! If space is really tight, opt for dwarf varieties (like ‘Moringa oleifera’ cultivars) or grow it in a large hanging planter.
How often should I fertilize my indoor moringa?
Feed your moringa every 4-6 weeks during spring/summer with a balanced liquid fertilizer (like 10-10-10). Cut back in fall/winter to once every 2-3 months—over-fertilizing burns roots. Signs you’re overdoing it: Crispy leaf edges or white residue on soil. Always water before fertilizing to prevent root burn!
Wrapping up and next steps
Growing a moringa tree indoors is a rewarding journey that brings nature’s superfood right to your kitchen! With the right balance of sunlight, soil, and patience, you’ll soon enjoy its vibrant leaves and powerful nutrients—without stepping outside. 🌱✨
Ready to take the next step? Start with a single seed or cutting, and watch your green thumb flourish! Share your progress with fellow plant lovers or explore recipes to turn your harvest into delicious, nutrient-packed meals.