
Propagation
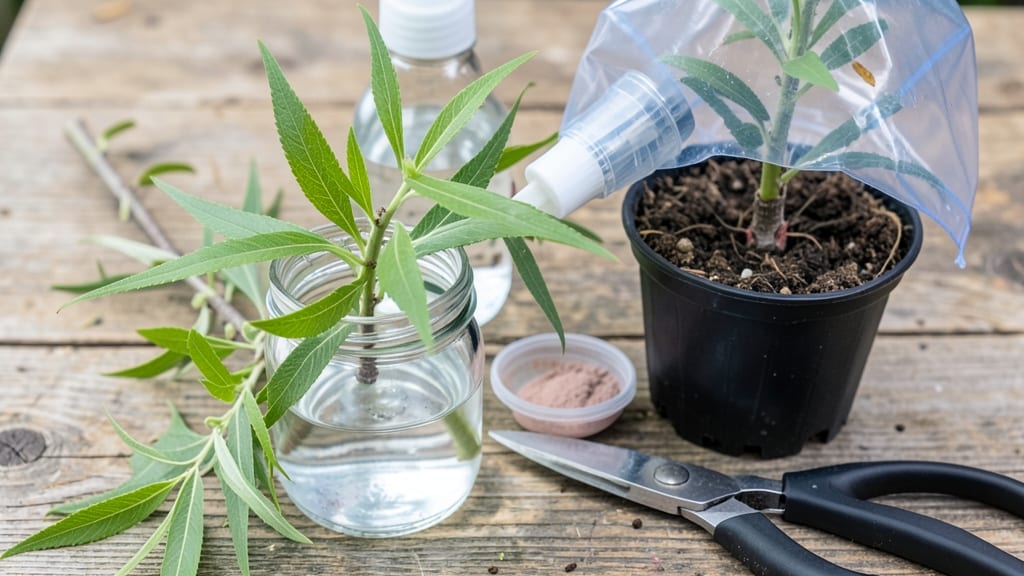
Starting a tree from a clipping is simpler than you think—my first willow cutting grew roots in just 14 days in a glass of water. 🌱 The key is choosing the right branch, timing it right, and creating the perfect conditions for growth.
Most people assume it’s complicated, but with the right approach, even hardwood trees like maple or birch can root successfully.
You’ll need sharp pruners, a clean container, and either water or a well-draining soil mix—no fancy equipment required. The best time to take cuttings is in late spring or early summer when new growth is still flexible.
Avoid woody stems, as they root poorly; instead, look for 4-6 inch semi-hardwood cuttings with a few leaf nodes.
By the end of the process, you’ll have a thriving young tree ready to transplant into the ground. The roots will be strong, and the plant will establish quickly. Whether you’re propagating fruit trees, shade trees, or ornamentals, this method works for almost any species.
Even if your first attempt fails, don’t give up—rooting success comes with practice. The biggest mistake is overwatering or using dirty tools, so keep everything clean and monitor moisture closely. With these steps, you’ll be growing your own trees in no time!
📚 In This Guide
- What you need
- Instructions
- Tips and common mistakes
- Wrapping up and next steps
What you need
- ● Healthy clippings: 4–6-inch-long cuttings with at least 2–3 leaf nodes (avoid flowering or diseased branches).
- ● Rooting hormone: A gel or powder (e.g., Rootone) to boost root growth—1 small bottle is plenty.
- ● Well-draining soil mix: A blend of 50% perlite, 30% peat moss, and 20% vermiculite (or a pre-made propagation mix).
- ● Small pots or containers: 4–6 4-inch diameter pots with drainage holes (or a seed tray).
- ● Spray bottle: For misting clippings (a 16-ounce bottle works well).
- ○ Plastic wrap or humidity dome: To create a greenhouse effect (optional but helpful).
- ● Sharp pruning shears or scissors: Clean, sterilized tools for clean cuts.
- ● Heating mat: A propagation mat (set to 70–75°F) to speed up rooting.
- ● Grow lights: If natural light is limited (LED or fluorescent bulbs work).
- ● Fertilizer (low-dose): A diluted seaweed or fish emulsion (once roots appear).
- ● Label markers: To track clipping types and dates.
Step-by-Step instructions for starting a tree from a clipping
Here's the simple method I've used to root cuttings from willow, maple, and even fruit trees—no fancy equipment needed.
🌱 Step 1: Select and Prepare the Right Cutting
Choose a healthy, pencil-thick stem from the current season's growth—it should be about ¼ to ½ inch in diameter and 4-6 inches long. The best cuttings have at least 3-4 leaf nodes (those little bumps where leaves grow). Use sharp pruners to make a clean cut just below a node at a 45-degree angle—this increases surface area for roots to form.
Remove the lower leaves but leave the top 2-3 leaves intact. This prevents rot while allowing the cutting to photosynthesize. I like to dip the cut end in rooting hormone powder (optional but helpful for faster results), then tap off any excess so it doesn't clump on the stem.
🪴 Step 2: Plant the Cutting in Moist Growing Medium
Fill a small pot (at least 4 inches deep) with a mix of 50% perlite and 50% peat moss—this combo stays moist but drains well. Moisten the mix until it feels like a damp sponge, not soggy. Make a hole with your finger about 2 inches deep and insert the cutting so that 2-3 nodes are buried below the surface.
Gently press the soil around the stem to remove air pockets, then water lightly until moisture seeps from the bottom drainage hole. Place the pot in a bright spot that gets indirect light—direct sun can dry out the cutting too quickly. I cover the pot with a clear plastic bag secured with a rubber band to create a humid microclimate.
☀️ Step 3: Provide Warmth and Humidity for Root Growth
Keep the soil consistently moist by misting daily or watering when the top ½ inch feels dry. Roots typically form in 4-8 weeks, but patience is key—some slow growers take up to 3 months. I place my cuttings on a seedling heat mat set to 70-75°F to speed up rooting, though a warm windowsill works too.
Watch for new growth at the top as a sign roots are forming below. If the leaves yellow or wilt, the humidity is too low—mist more frequently or add a pebble tray under the pot. Avoid overwatering; soggy soil causes rot. When you see new leaves and the stem feels firm when tugged gently, roots are ready.
✂️ Step 4: Transplant and Care for Your New Tree
Once roots are established (usually when you can see them through the pot or they fill the root ball), transplant to a larger container or directly into the ground. Handle the cutting gently—you've worked hard for those roots! Water deeply after transplanting to settle the soil and reduce shock. Keep the young tree in partial shade for a few weeks while it adjusts.
After the first month, gradually introduce it to full sun and reduce watering to every 2-3 days once established. Fertilize lightly with a balanced 10-10-10 mix in spring to encourage strong growth. With proper care, your clipping will grow into a thriving tree in just a few seasons!
Tips & tricks for starting a tree from a clipping
Here's what nobody tells you about making this simple method work every time—no green thumb required.
Selection is Everything: In Step 1, focus on stems that bend slightly without snapping—they're young enough to root. Avoid woody, mature branches that feel hard and dry. I've found willow cuttings root fastest because their bark peels easily, but even fruit tree clippings work with the right care. The 45-degree angle cut isn't just decorative—it creates more surface area for those tiny root cells to emerge.
Soil Science Matters: When mixing your 50% perlite/50% peat moss in Step 2, don't skip the pressing step. Gently compact the soil around the stem to eliminate air pockets that would prevent root contact. I like to add a pinch of cinnamon to the soil mix—it's a natural antifungal that prevents rot while your roots develop. The plastic bag trick in Step 2 creates a greenhouse effect, but leave it slightly open for airflow to prevent mold.
Patience Pays Off: The 4-8 week rooting window in Step 3 is just a guideline—some tropical cuttings take half that time while citrus can take twice as long. I've had maple cuttings surprise me by rooting in just 3 weeks, so don't give up if nothing happens after 6 weeks. The heat mat at 70-75°F is optional but makes a noticeable difference in cooler homes. Watch for tiny white root hairs at the soil line—they're your first sign of success.
Transplanting Wisdom: In Step 4, when checking for root readiness, gently tug the cutting. If you feel resistance but it doesn't pop out easily, roots are forming. For outdoor planting, choose a cloudy day to minimize transplant shock. I've had best results transplanting in early morning when temperatures are cooler—it gives the cutting a full day to recover before afternoon heat stress.
Pro Tips for Start A Tree From A Clipping
- Here's what nobody tells you about making this simple method work every time—no green thumb required.
- Selection is Everything: In Step 1, focus on stems that bend slightly without snapping—they're young enough to root. ...
- Soil Science Matters: When mixing your 50% perlite/50% peat moss in Step 2, don't skip the pressing step. Gently comp...
Frequently asked questions
Can any tree branch be rooted from a clipping?
Not all trees thrive from cuttings! Hardwood trees (like willow, poplar, or maple) root easily, while softwood (e.g., fruit trees) or tropical plants (e.g., mango) often need grafting or seeds. Check if your tree is non-grafted—grafted varieties rarely root true to type. When in doubt, research your specific species!
How long does it take for a clipping to root?
Patience is key! Most cuttings take 4–12 weeks to develop roots, depending on the species, humidity, and care. Willow or poplar cuttings may sprout roots in as little as 2–3 weeks, while others (like olive or citrus) can take months. Monitor moisture and avoid overwatering—yellowing leaves signal stress, not failure!
What if my clipping rots before rooting?
Rotting is a common issue, but you can prevent it! Ensure your cutting has 1–3 healthy nodes (bumps where leaves grow) and trim just below one. Use a well-draining mix (perlite + peat) and keep humidity high (a plastic bag or propagator helps). If mold appears, reduce moisture and improve airflow—no soggy soil!
Can I root a clipping in water instead of soil?
Yes! Water propagation works for some trees (like willow, birch, or mint), but it’s not ideal for most. Roots grown in water can be weaker and more prone to rot when transplanted. If you try it, change the water every 3–5 days and move to soil once roots reach 2–3 inches. For best results, stick with soil for woody plants.
How do I know if my rooted clipping is ready to plant outdoors?
Your clipping is ready for the great outdoors when it has a sturdy root system (3+ inches long) and new growth (leaves or stems). Harden it off first: gradually expose it to outdoor conditions over 1–2 weeks to avoid shock. Plant on a cloudy day or in late afternoon to reduce stress. Mulch well to retain moisture!
What if my clipping doesn’t root at all?
Don’t give up! Try these fixes:
- Check hormones: Dip the cut end in rooting hormone (boosts success by 30–50%).
- Adjust light: Bright, indirect light (like a north-facing window) is best—direct sun can scorch.
- Test the clipping: If it’s old wood (brown, brittle), try a fresh, green cutting instead.
- Patience pays: Some species (like olive or rosemary) are slow—wait up to 6 months.
Wrapping up and next steps
Starting a tree from a clipping is a rewarding way to grow your own greenery—and you’ve got all the tools to succeed! 🌱 With the right cuttings, patience, and care, you can nurture a thriving plant that’ll bring life to your space for years.
Now that you know the steps, why not try it with a favorite plant today?
Ready to take the next step? Experiment with different plants, track your progress, and share your green thumb wins with fellow gardeners! Happy growing! 🌿